Select Categories
Run Custom Log Search
March 13, 2024Query Rules Panel
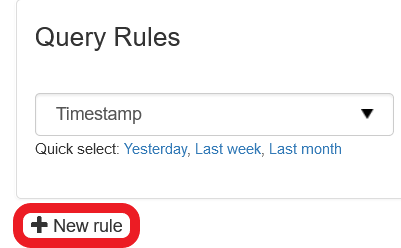
The Query Rules panel allows you to customise your search filters. The default query rule for the Log Search is the Timestamp rule.
Use the shortcuts beneath the Timestamp filter to quickly select results from Yesterday, the Last week and Last month.


The Query Rules are constructed of three parts:
- The part of the message/metadata you are looking for - Select from the first dropdown in the Query Rules panel
- The type of match e.g. contains, does not start with etc. - Select from the second dropdown in the Query Rules panel
- The content you are trying to match
All query rule possibilities and types
| Message Part | Match Type | Content |
| Message ID |
|
Text box; enter Message ID to search for |
| Filtering Host |
|
Text box; enter Filtering Host to search for |
| Timestamp |
|
Date and time selector |
| Sender |
|
Text box; enter Sender address to search for |
| Recipient |
|
Text box; enter Recipient address to search for |
| Sender Hostname |
|
Text box; enter Sender Hostname to search for |
| Sender IP |
|
Text box; enter Sender IP to search for |
| Sender Location |
|
Text box; begin typing a country to see a list of pre-populated locations or type:
|
| Bytes Received |
|
Text box; enter number of bytes to search for |
| Bytes Sent |
|
Text box; enter number of bytes to search for |
| Main Class |
|
Text box; begin typing a message class or click to see a pre-populated list of suggestions split into:
|
| Sub Class |
|
Text box; enter the Sub Class of a message to search for |
| Extra Class |
|
Text box; enter Extra Class to search for |
| Error Class |
|
Text box; enter Error Class to search for |
| From |
|
Text box; enter From address to search for |
| To |
|
Text box; enter To address to search for |
| CC |
|
Text box; enter CC addresses to search for |
| Subject |
|
Text box; enter Subject to search for |
| Original Message ID |
|
Text box; enter the Original Message ID to search for |
| Status |
|
Text box; begin typing a message Status or click to see a pre-populated list of suggestions split into:
|
| Delivery Date |
|
Date and time selector |
| Delivery IP |
|
Text box; enter Delivery IP address to search for |
| Delivery Hostname |
|
Text box; enter Delivery Hostname to search for |
| Delivery Port |
|
Text box; enter Delivery Port to search for |
| Delivery Data |
|
Text box; enter Delivery Data to search for |
| Delivery Interface |
|
Text box; enter Delivery Interface to search for |
Step 2 - If you wish, you can use the Quick select shortcuts provided e.g. Accepted; Not accepted.

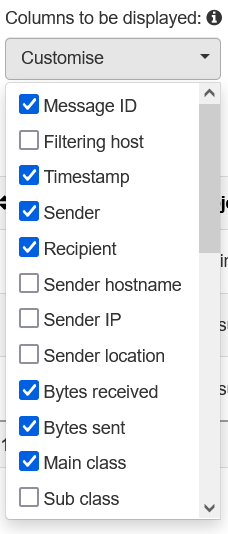
There are many options available, with the most useful choices outside of the defaults being:
- Sub Class - Why the message was given the Main Class that it was assigned to the message. For example, if the message was classed as Spam, the Sub Class may be DNSBL (DNS Block listed).
- Extra Class - The detail on why the Main Class and Sub Class were assigned to the message. For example, if the message was classed as Spam, the Sub Class may be DNSBL (DNS Block listed), so the Extra Class will provide the DNS Block list in question.
- Delivery Data - Shows the destination mail server's most recent response to the filtering server's attempt to deliver. For example, if a message is accepted by the filter but can't be found in the recipient's Inbox, this field will show if the message was delivered to the destination mail server or not.

There are three options available for this:
- None - this will disable the summary row so nothing will be displayed
- Total - this will display a row at the bottom of the table which will calculate the total of any columns containing number values such as Bytes Sent and Bytes Received

- Average - this will display a row at the bottom of the table which will calculate the average of any columns containing number values such as Bytes Sent and Bytes Received

Step 5 - Use the Group results by: dropdown and select from the list if you want to group the results by category. For example, to group the results by sender, select Sender
Step 6 - Once you have specified your filters, click on Show Results to run the search and display the results at the bottom of the page