Select Categories

How to Upload CRM Products

October 24, 2024

Section 1: How to Access CRM System

Before accessing CRM system, you need to make sure the CRM system is activated.
After the CRM system is activated, it will appear in the left-side menu > Click CRM > Go to CRM System

Section 2: How to Create and Manage Product Categories

How to Upload CRM Products | Picture 1
Step 1: Mouse hover to CATALOG and choose CATEGORIES.

Step 2: Click "Add Category"
How to Upload CRM Products | Picture 2
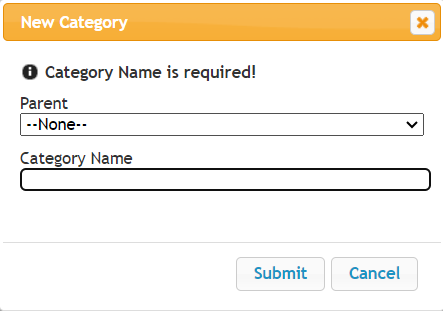
Step 3: Fill in your category name > Once done, click "Submit"
How to Upload CRM Products | Picture 3
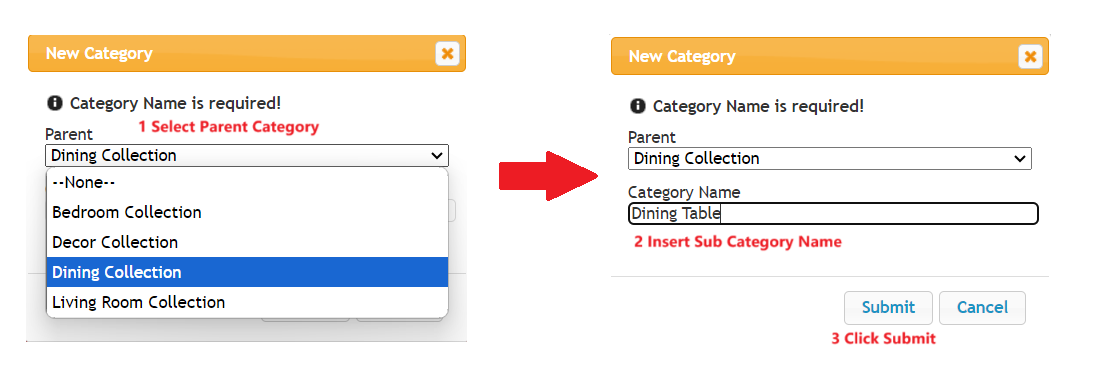
If you wish to create a subcategory, please choose a parent category and fill in the subcategory name. Once done, click 'Submit.
How to Upload CRM Products | Picture 4
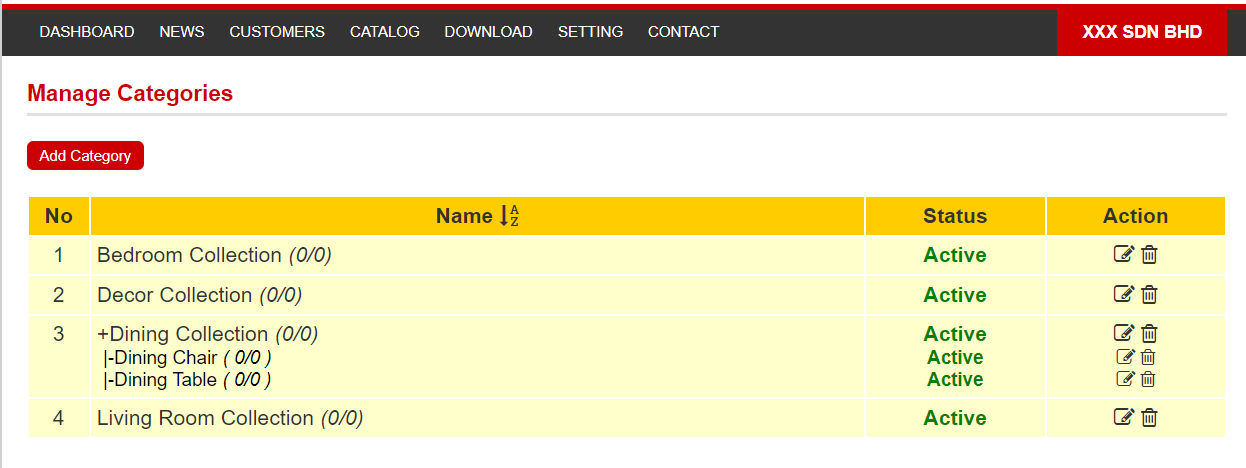
You can check your main and subcategories after they are created. Click the status to change between active and inactive. You can also click the  icon to edit the category name. If you wish to delete the category, click the icon.

Section 3: How to Add Products

How to Upload CRM Products | Picture 5
Step 1: Mouse hover to CATALOG and choose PRODUCTS.

Step 2: Click "Add Product"
How to Upload CRM Products | Picture 6
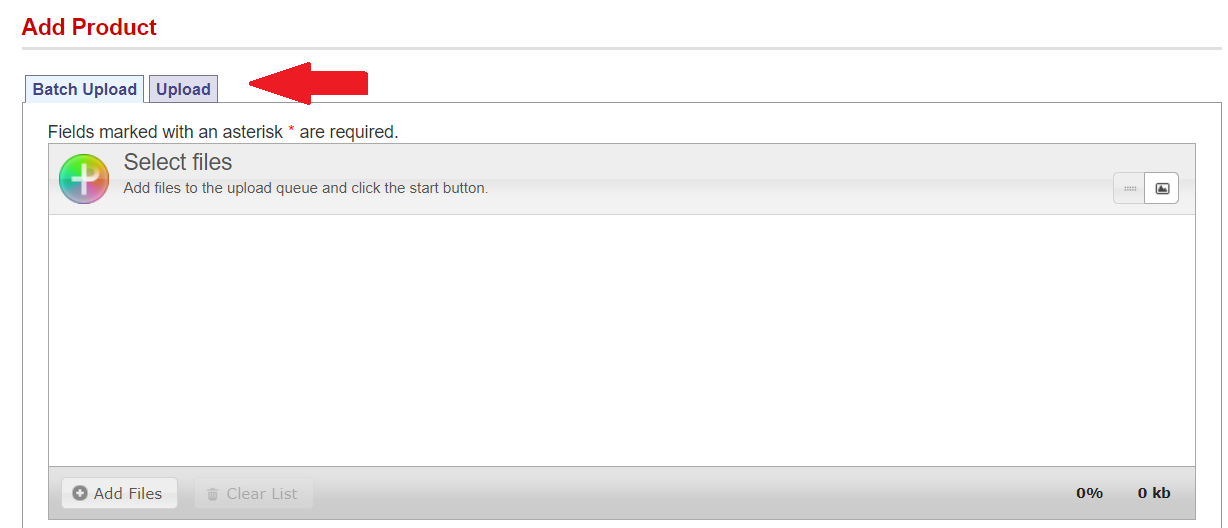
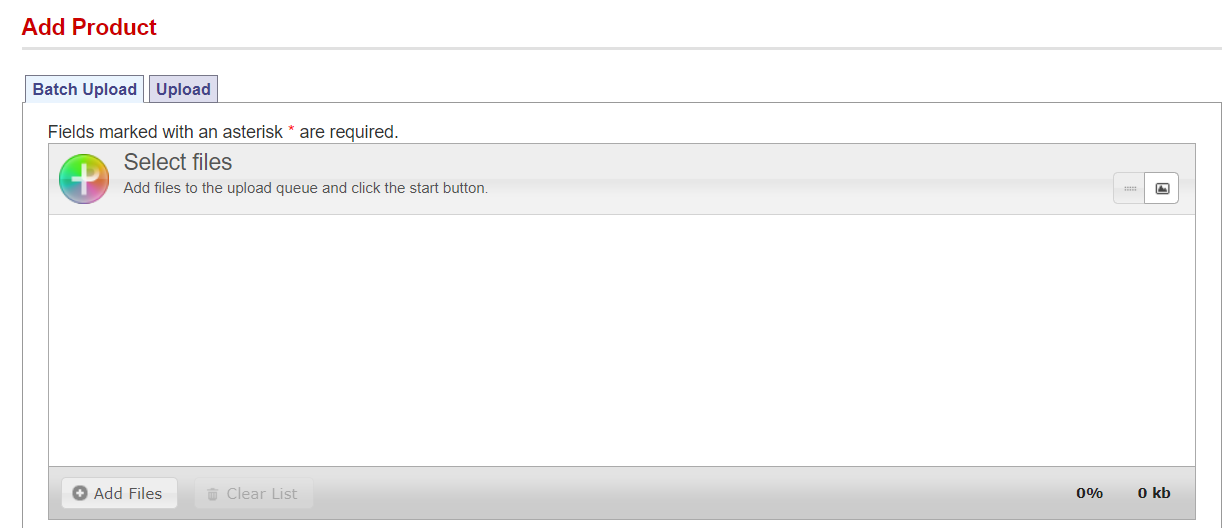
You can choose to batch upload multiple products or upload a single product.

a) Batch Upload
How to Upload CRM Products | Picture 7
Step 3a: Click "Add Files" > Select the product picture > Click "Open"
How to Upload CRM Products | Picture 8

Step 4a: Fill in the product name. If the picture name is the same as your product name, you can tick the small box.

Step 5a: Fill in the product price. This is the default price for all customer levels. After adding the product, you can customize different prices for different levels.

Refer to Section 4, Step 3a or Step 4b to customize the product price.

Step 6a: Select the product category and subcategory (if have) 

Step 7a: Tick the small box for the levels in which you wish to display the product.
How to Upload CRM Products | Picture 9
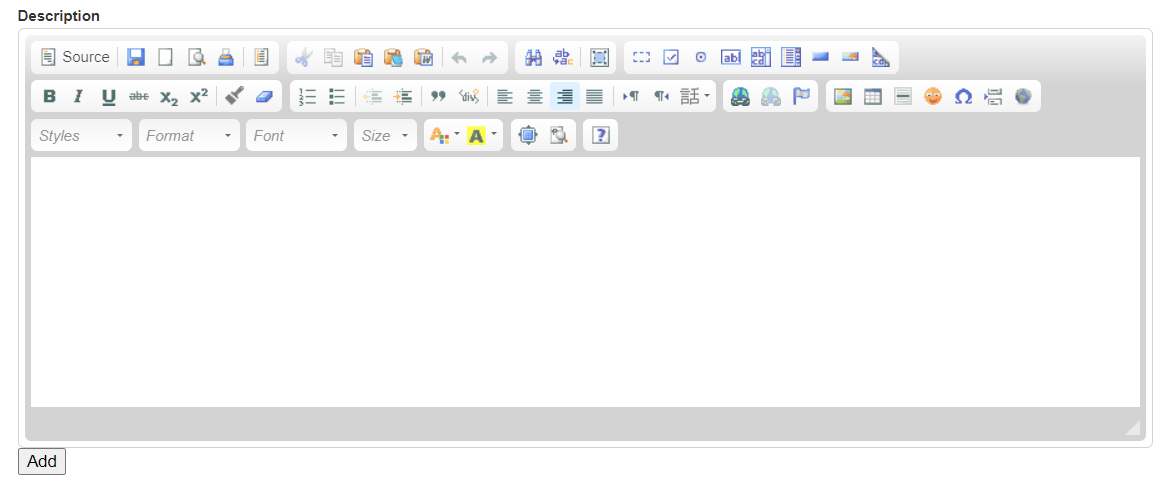
Step 8a: Add product description

Step 9a: Once done, click "Add"

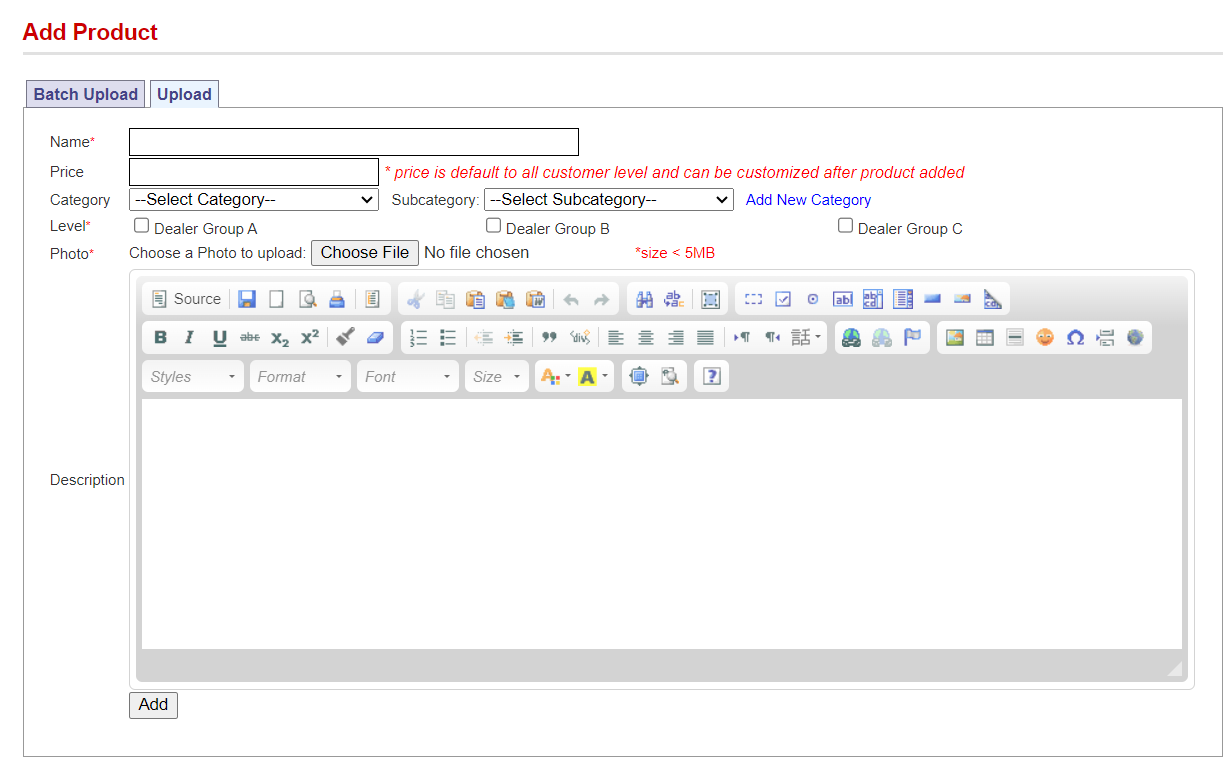
b) Single Upload Product
How to Upload CRM Products | Picture 10
Step 3b: Click "Upload"
How to Upload CRM Products | Picture 11
Step 4b: Fill in product name

Step 5b: Fill in the product price. This is the default price for all customer levels. After adding the product, you can customize different prices for different levels.

Refer to Section 4, Step 3a or Step 4b to customize the product price.

Step 6b: Select the main category and subcategory for the product. If you wish to add a new category, click 'Add New Category.'

Step 7b: Tick the small box for the levels in which you wish to display the product.

Step 8b: Click "Choose File" to upload a product picture

Step 9b: Add product Description. Once done, click "Add"
How to Upload CRM Products | Picture 12
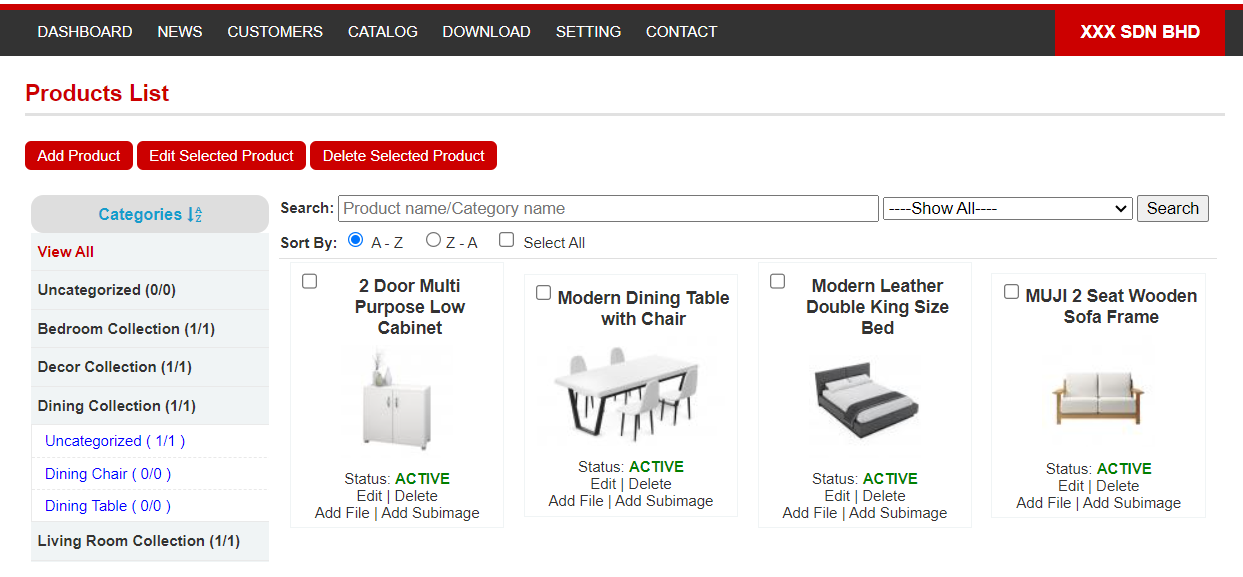
Once you have uploaded the products, they will appear in the product list. The left side of the product list shows all the categories and subcategories, while the right side displays the products you uploaded.

You can click on the categories to display only the products within those categories. You can also search for a product name or filter the products by different customer levels.

Section 4: How to Edit Product Information

You can choose to edit single products or multiple products. 

a) Edit Single Product
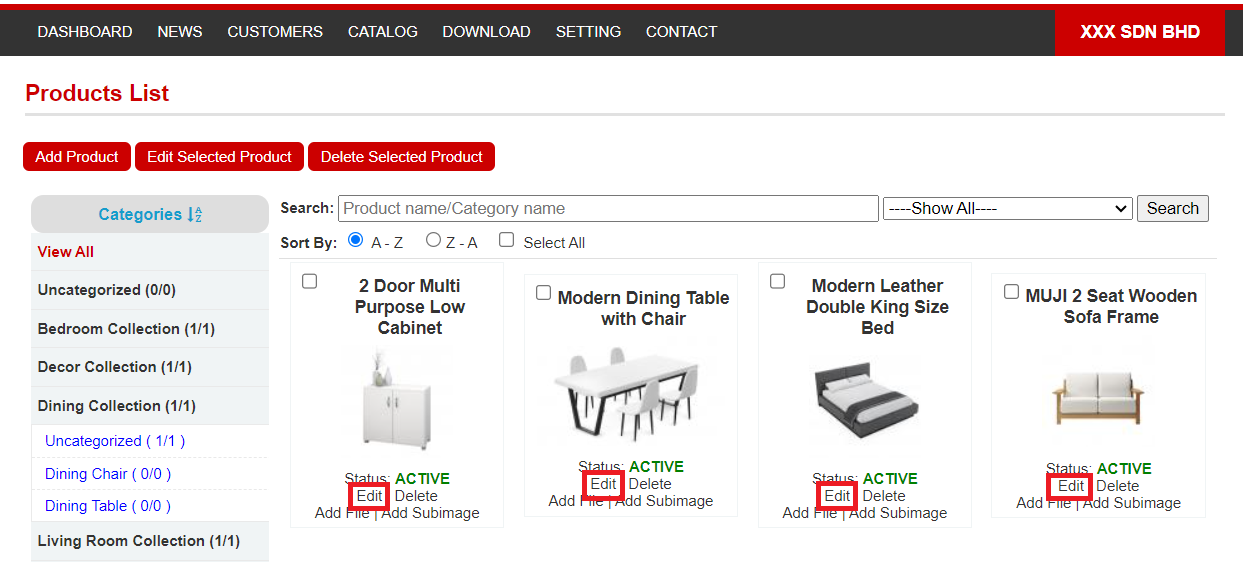
How to Upload CRM Products | Picture 13
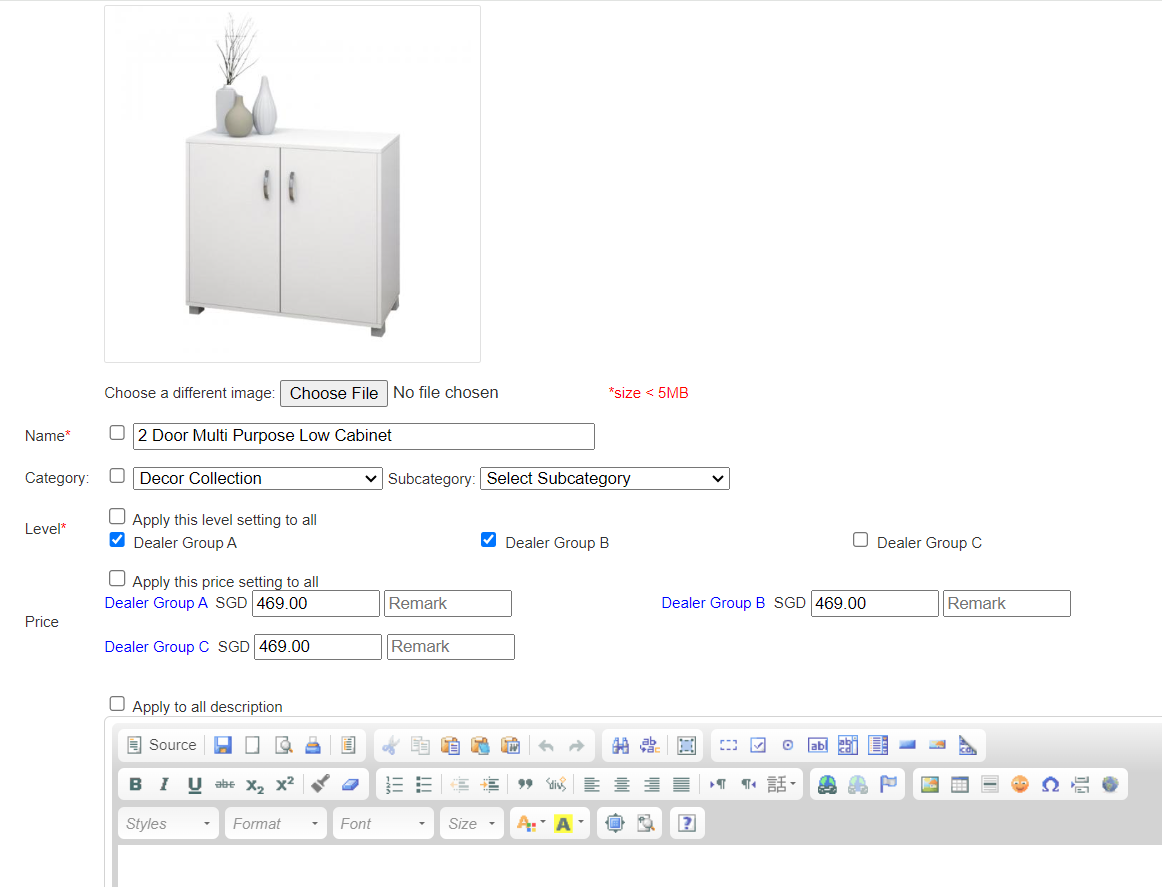
Step 1a: Select the product you wish to edit, click "Edit"
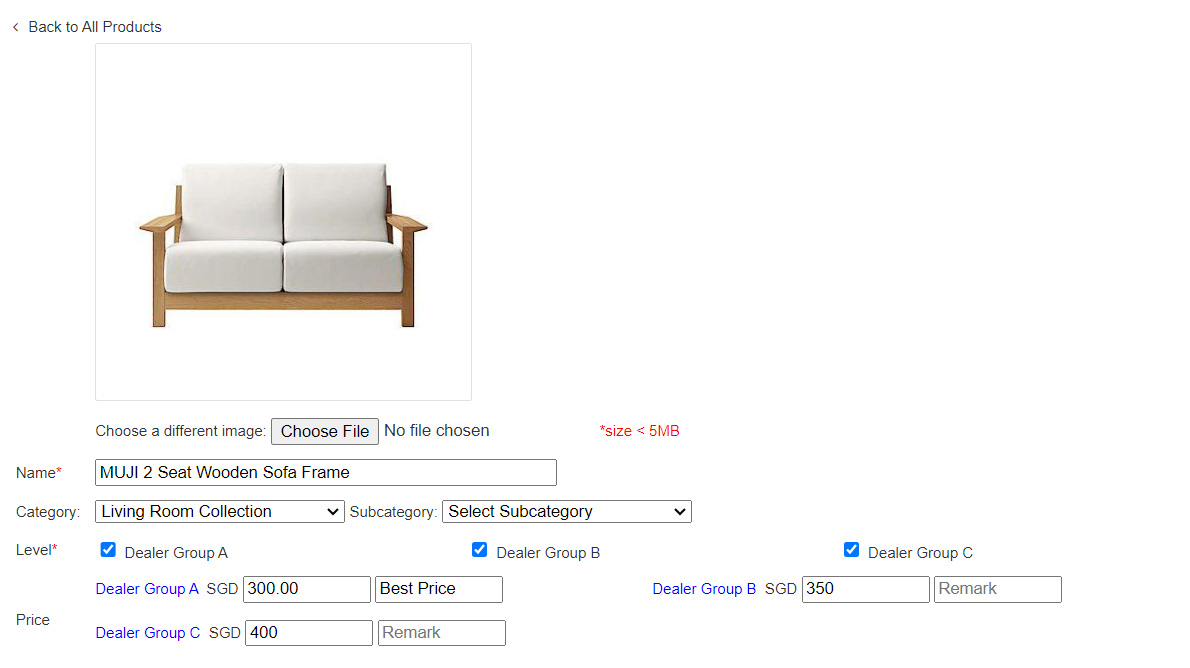
How to Upload CRM Products | Picture 14

Step 2a: Edit the product information (change product picture, edit product name, edit product category, edit customer level, edit product description).

Step 3a: You can customize different product prices for different customer levels by adding the price and any remarks (if applicable).

Step 4a: Once you are done editing, click 'Update.'

b) Edit Multiple Products
How to Upload CRM Products | Picture 15
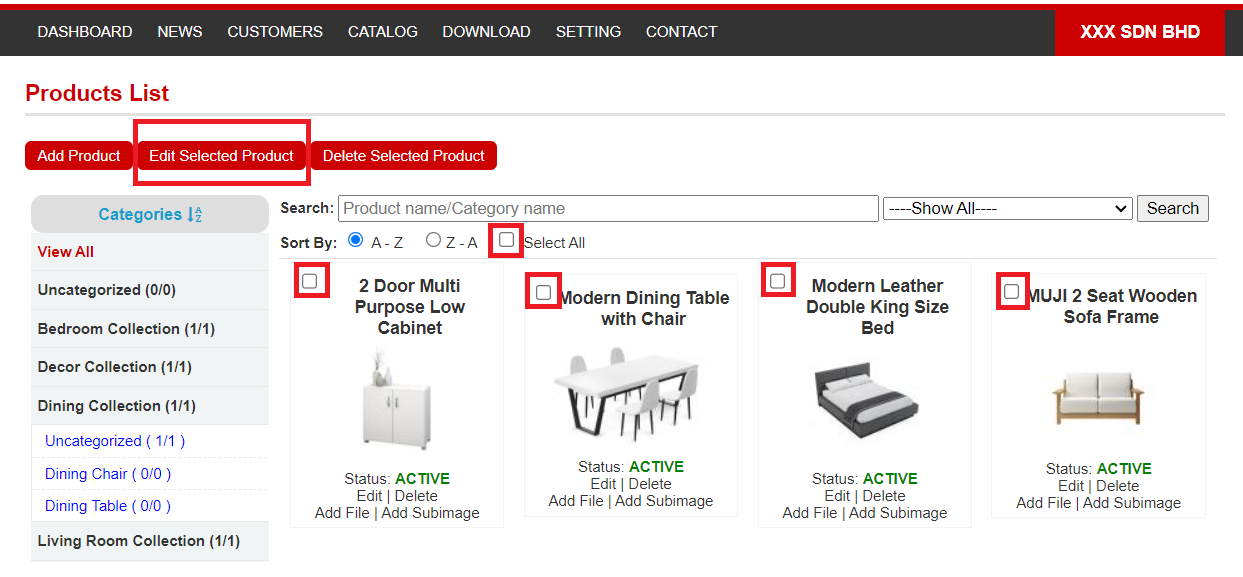
Step 1b: Select and tick the products you wish to edit and then click "Edit Selected Product"
How to Upload CRM Products | Picture 16

Step 2b: Edit the product information (change product picture, edit product name, edit product category).

Step 3b: Edit the customer level by ticking the option. If you want all selected products to share the same customer level, you can tick "Apply this level setting to all" and click OK.

Step 4b: Add the product price and any remarks (if applicable). If you want all selected products to share the same price and remarks, you can tick "Apply this price setting to all" and click OK.

Step 5b: Edit the product description. If you want all selected products to share the same product description, you can tick "Apply this description setting to all" and click OK.

How to Upload CRM Products | Picture 17
Step 6b: You can click 'Previous' or 'Next' to edit the information of each selected product. If you have finished editing all selected products, click 'Update All Products.
How to Upload CRM Products | Picture 18
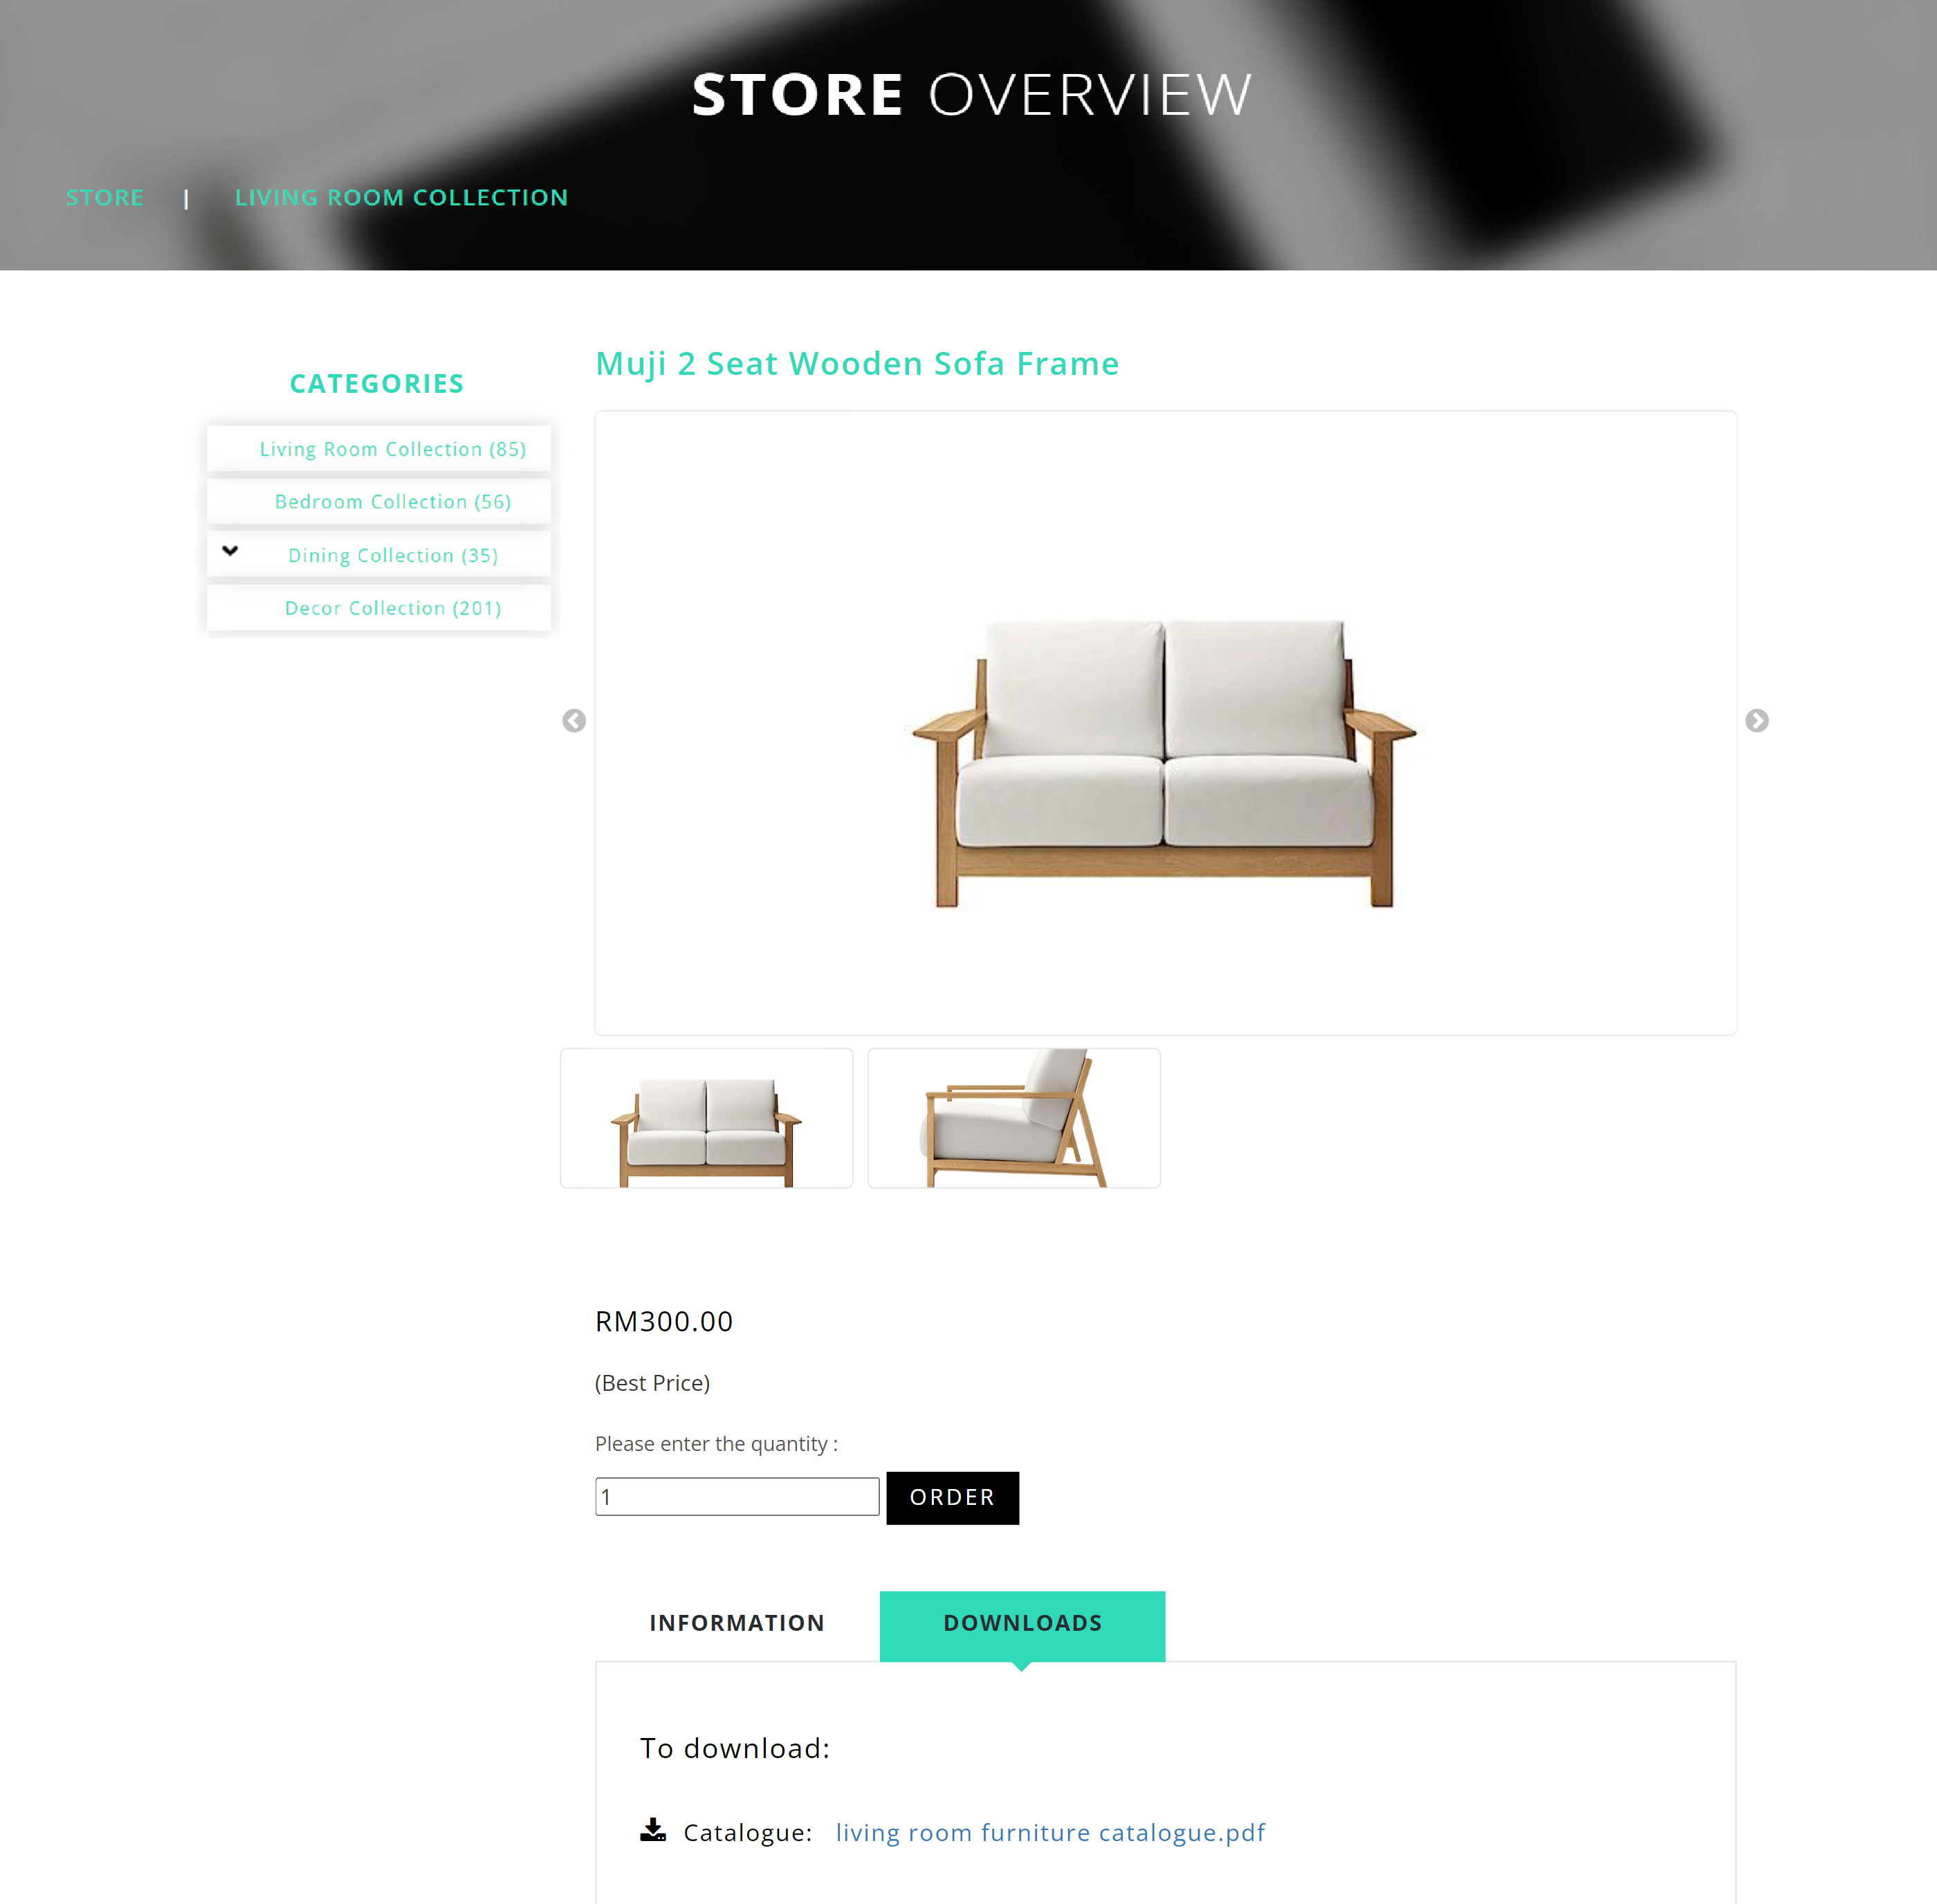
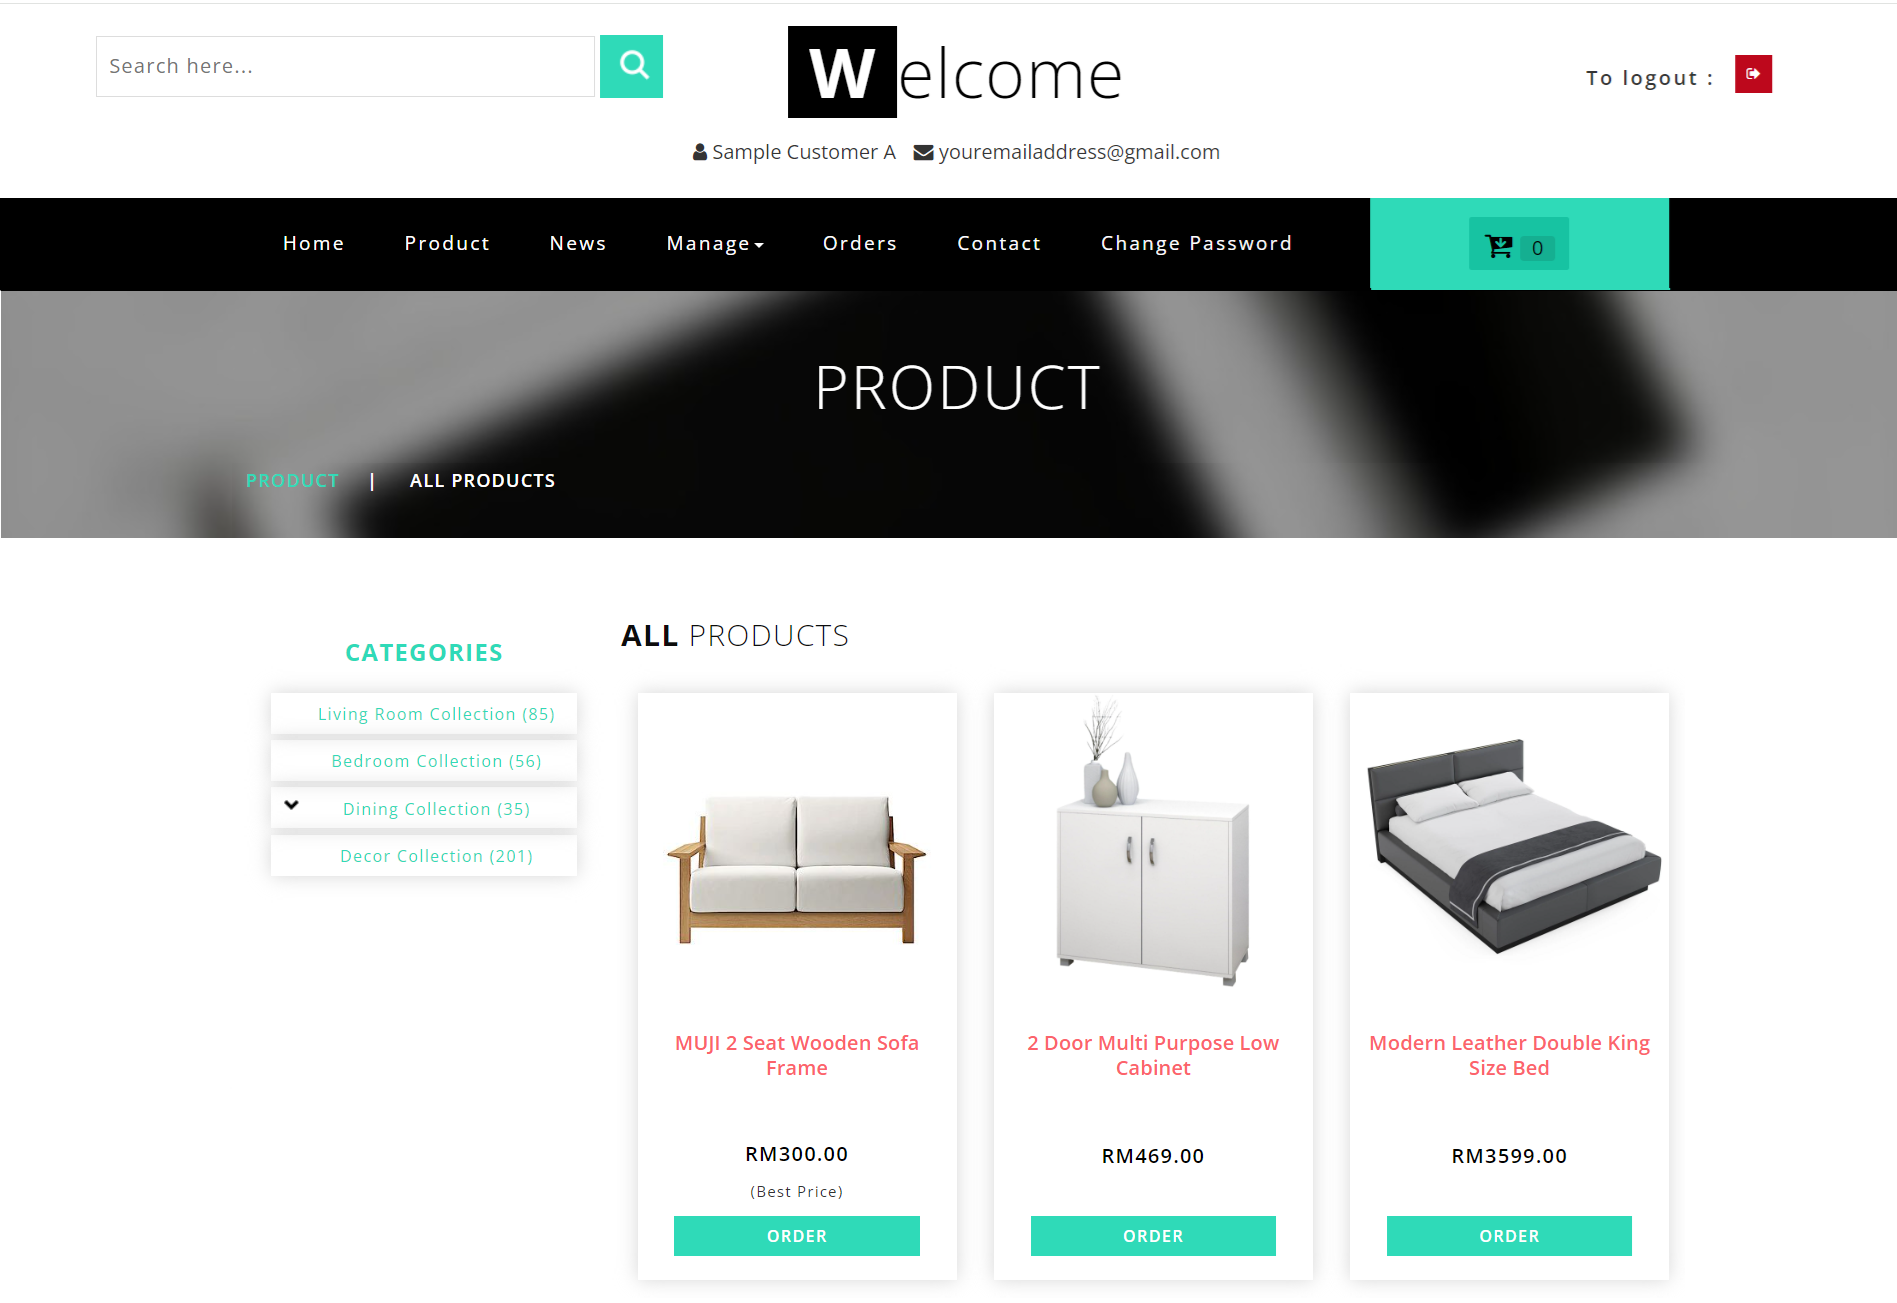
Here is a sample view of the product page on the website.

Section 5: How to Add Files

How to Upload CRM Products | Picture 19
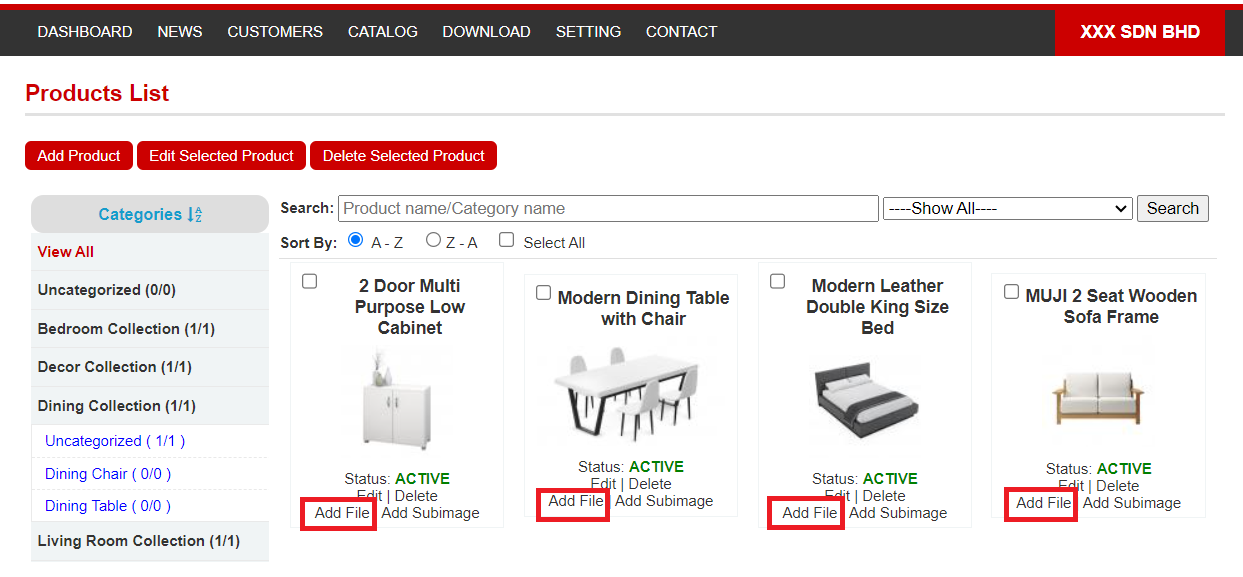
Step 1: Select the product that you wish to add file and then click "Add File".
How to Upload CRM Products | Picture 20
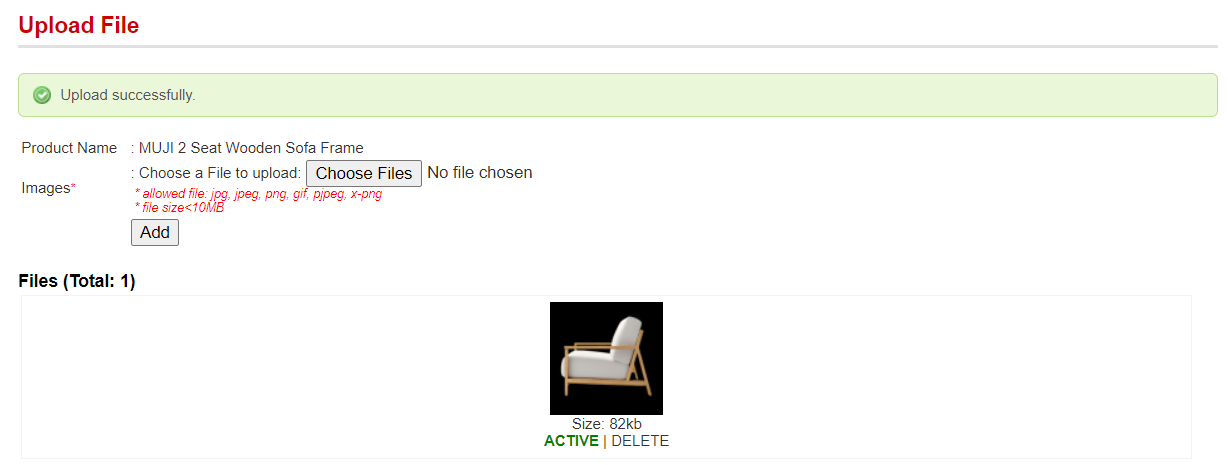
Step 2: Fill in the file name and choose a file to upload. Once done, click 'Add.
Please upload files in the following formats: jpg, jpeg, png, gif, pjpeg, x-png, pdf, doc, docx, xls, xlsx, ppt, and pptx. The file size must not exceed 10MB.
How to Upload CRM Products | Picture 21
If you wish to hide the file, you can click and change the status. If you want to delete the file, you can click 'DELETE.'

Section 6: How to Add Product Sub Image

How to Upload CRM Products | Picture 22
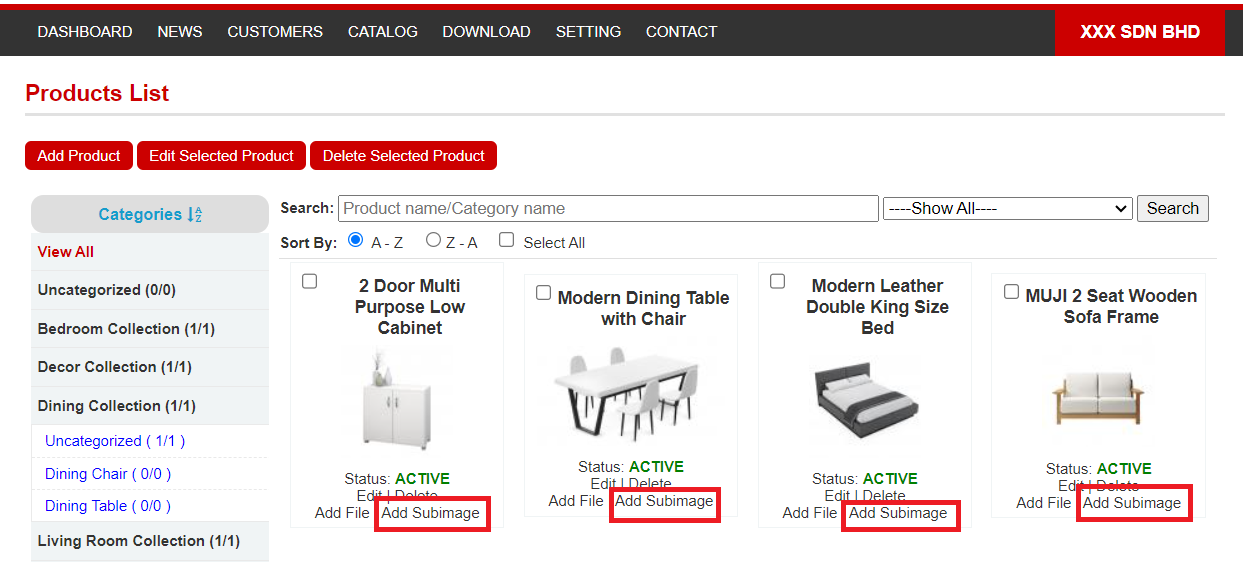
Step 1: Select the product that you wish to add sub image
How to Upload CRM Products | Picture 23
Step 2: Choose a file to upload. Once done, click 'Add'.
Please upload files in the following formats: jpg, jpeg, png, gif, pjpeg, x-png. The file size must not exceed 10MB.
How to Upload CRM Products | Picture 24
If you wish to hide the sub-image, you can click and change the status. If you want to delete the sub-image, you can click 'DELETE.'
How to Upload CRM Products | Picture 25
Here is a sample view of a product with sub-images and files.

Tags:

Related Article: