Select Categories
How to Set Up Auto-Generated Invoices
February 29, 2024Section 1: Introduction
When customers make purchases on your website, they can request an invoice for their purchase. With the auto-generate invoice setting, there's no need to generate invoices manually anymore. Once the setting is enabled, the system will automatically generate invoices and send them to buyers via email when the payment is completed.
Section 2: How to Access to Invoice Setting
Method 1: Search "Invoice Setting" in the Search menu at the top of NMS.
Method 2: Go to My Sales > Invoice > Click Invoice Setting
Method 3: Go to My Sales > E-commerce Setting > Setting > Invoice Setting
Section 3: Set up Auto-Generate Invoices

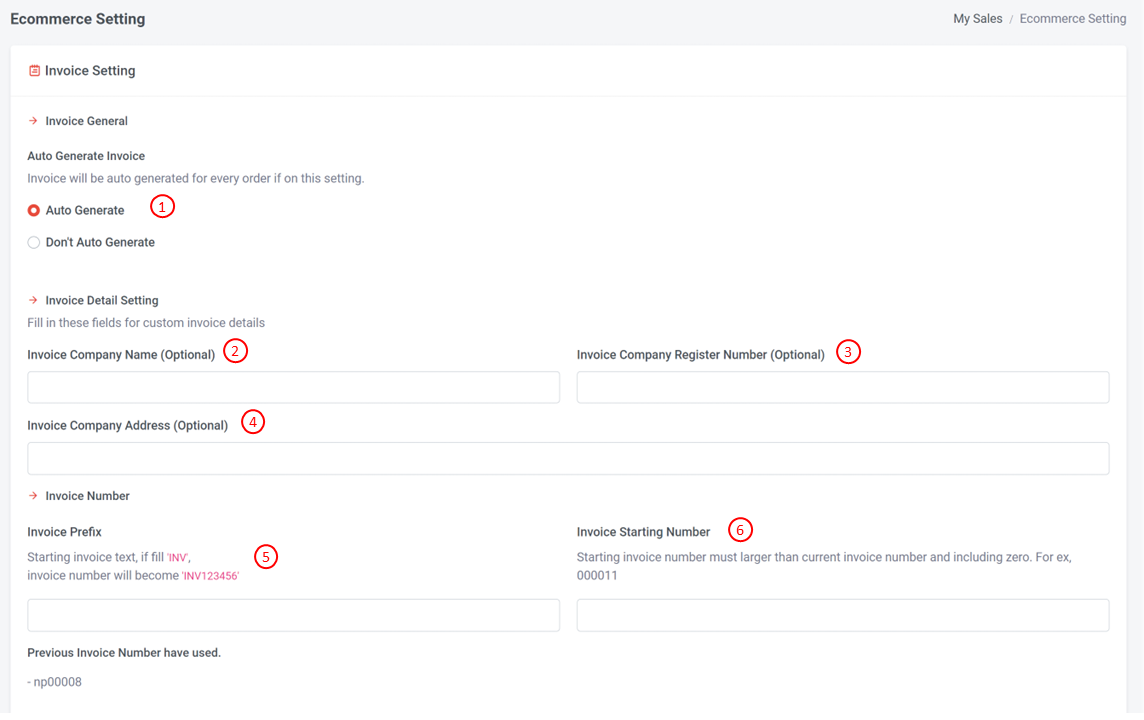
Step 1: Fill in the information below:
1. Auto Generate: Enable this option to automatically generate invoices.
Don’t Auto Generate: Select this if you do not want invoices to be generated automatically.
2. Invoice Company Name (Optional): The name of the company to be displayed on the invoice.
3. Invoice Company Register Number (Optional): The official registration number of the company (optional).
4. Invoice Company Address (Optional): The business address of the company to be included on the invoice (optional).
5. Invoice Prefix: A specific set of characters is added at the beginning of each invoice number for identification purposes (e.g., INV-001).
6. Invoice Starting Number: The initial number from which the sequence of invoice numbers begins (e.g., starting from 001).
7. Previous Invoice Number Used: The last generated invoice number used in the system.
Step 2: Once done, click "Update"
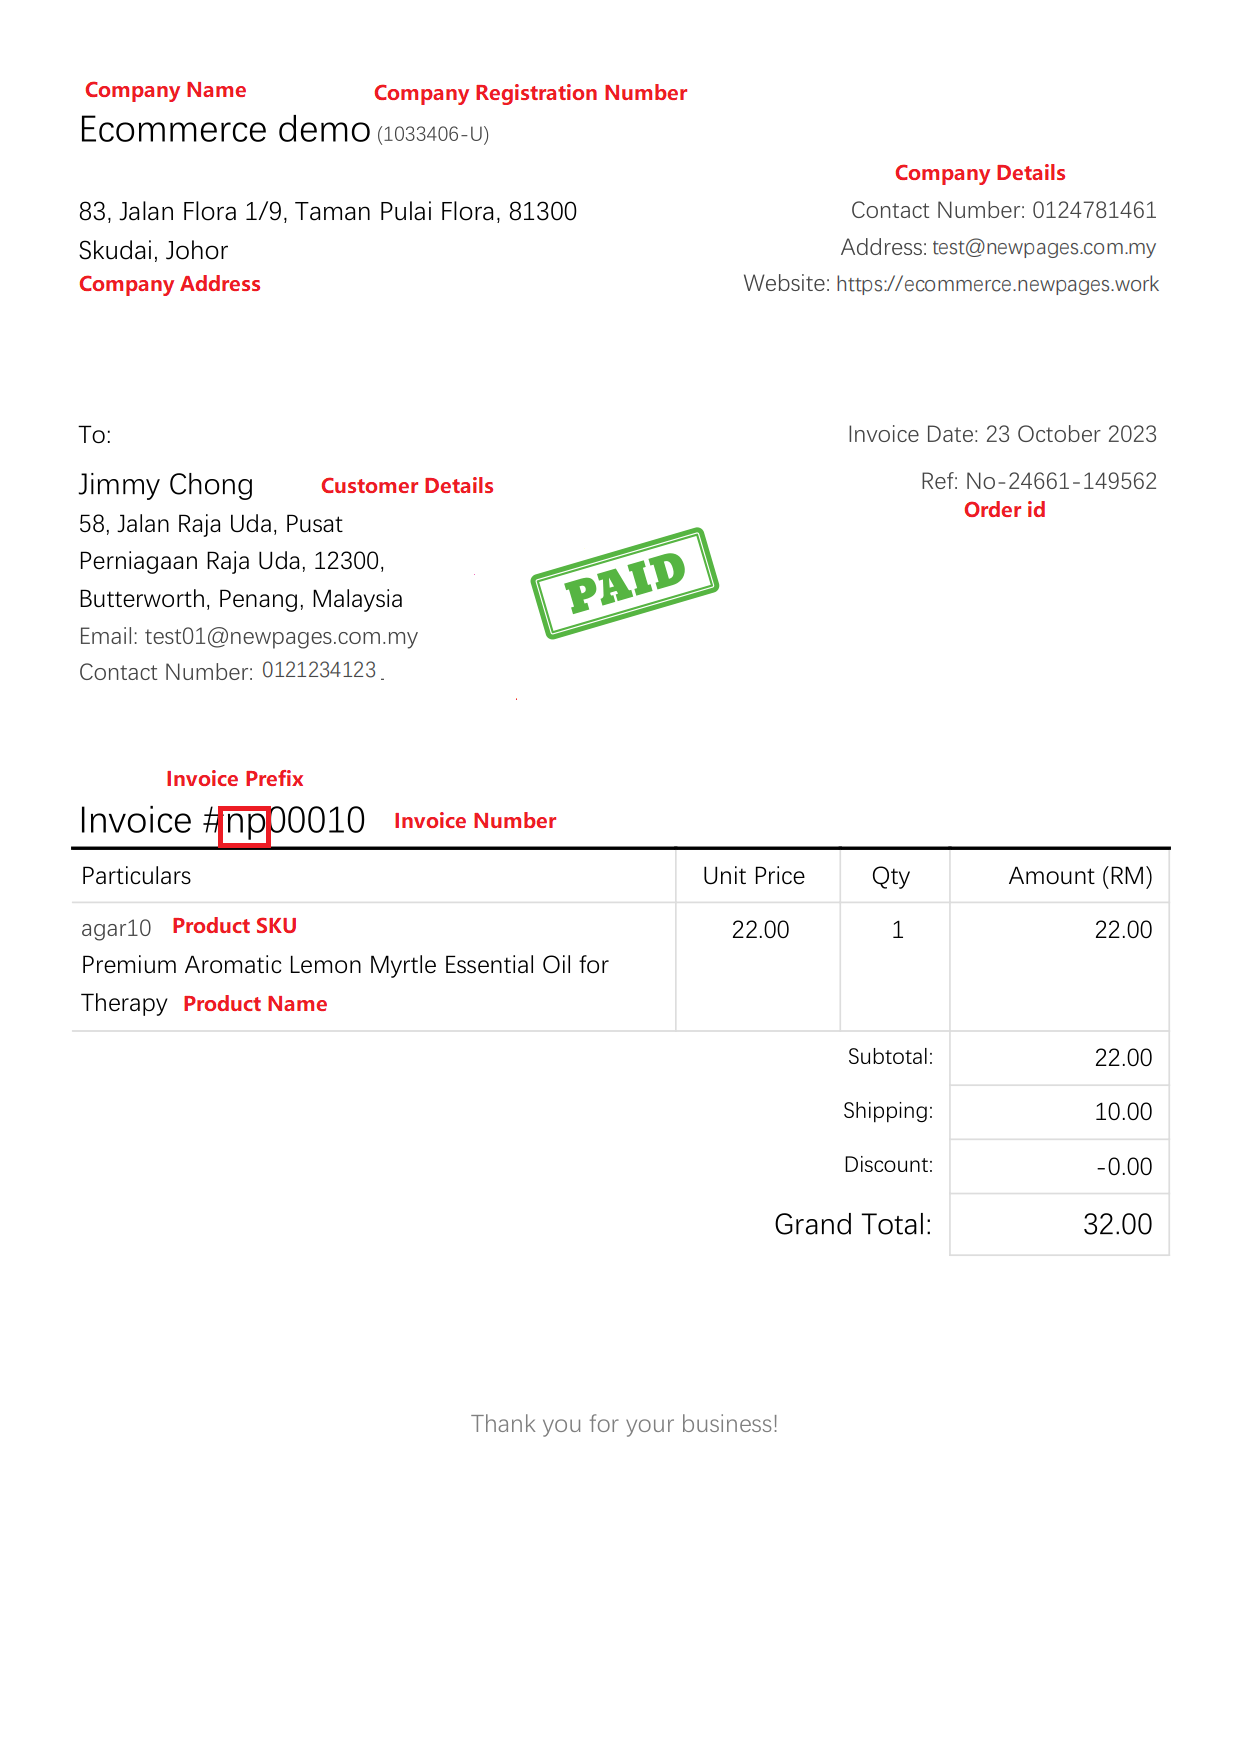
Section 4: Invoice Sample
