Select Categories
How to Upload Products
October 9, 2024Section 1: Introduction

There are 2 ways to upload products:
1. Single - Upload products one by one.
2. Multiple - Upload more than one product at once.
Section 2: How to Upload Single Product
Step 1: You can search "Add single product" in the search menu or
Go to Manage > Products > All Products

Step 2: Click "Add Product" button
Step 3: Click "Single" button

There are three languages you can add. If you have add-on additional languages, once fill in the information, it will display the details for each language. If you did not add-on additional languages, it will also show on our NEWPAGES business portal.
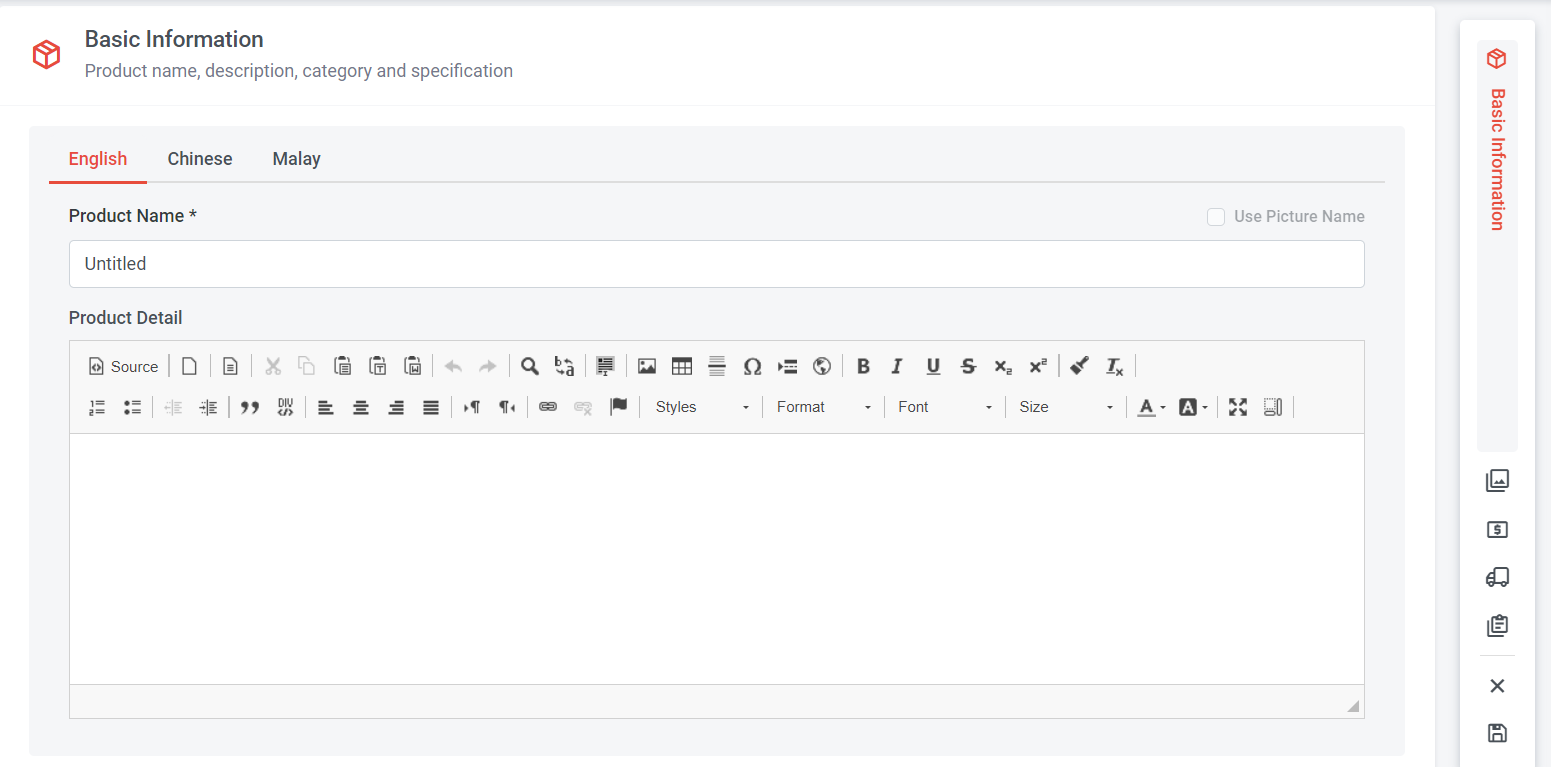
Step 4: Fill in the Product Name. (You can also tick 'Use Picture Name,' and the product name will automatically be set based on your picture name).
Step 5: Fill in Product Detail
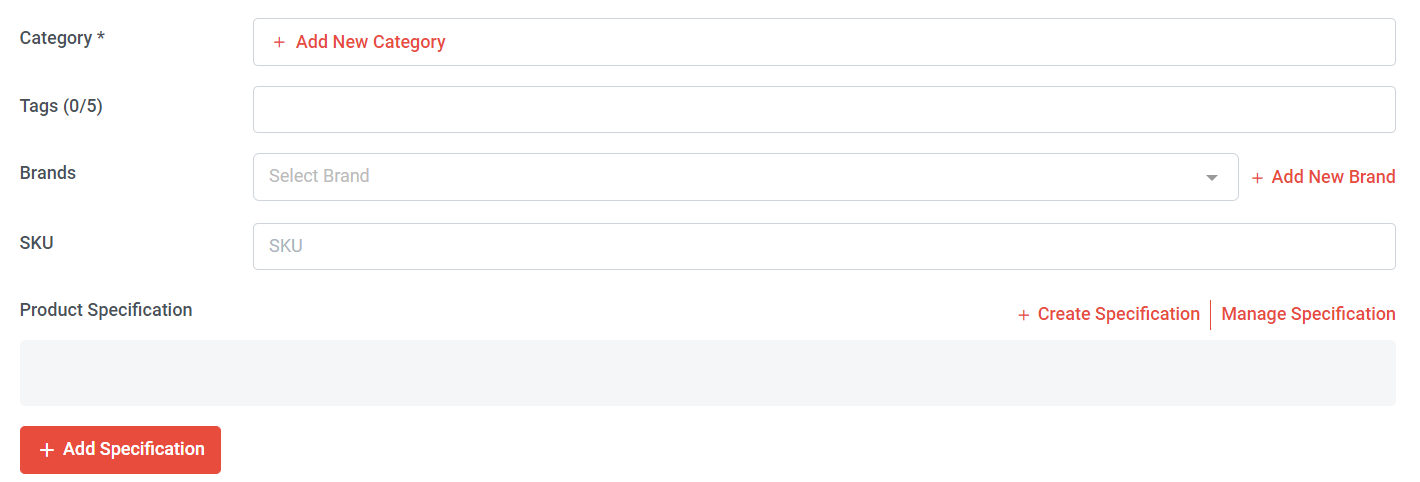
Step 6: Click "Add New Category" to add a category
Note: The product category is a mandatory field and must be filled in before you save.
Learn more details about How to Manage Product Category (Add, Edit, Delete, Sort)
Step 7: Fill in the tags (maximum 5 tags) > Press 'Enter' on your keyboard to save the tag; if not, it will not be considered saved.
Learn more details about How to Manage Tag (Add, Edit, Delete)
Step 8: Select Brand or add new brand
Learn more details about How to Manage Brand (Add, Edit, Delete, Sort)
Step 9: Add product SKU (if have)
SKU stands for 'Stock Keeping Unit.' It is the distinctive code used as the product identifier assigned to each product in a company's inventory.
Step 10: Add Specification
Learn more details about How to Manage Product Specification (Add, Edit, Delete, Sort)

Step 11: Click the column or icon > Select the product images and click open
Learn more details about How to Manage Product Images (Add, Edit, Download)

Step 12: Add Youtube link (if have)
You can get you Youtube Link > Paste to the column > Click "Add Video Link"

Step 13: Insert product price
Step 14: Select stock status (Unlimited, Custom Quantity)
If your products have quantity limits, you can select 'Custom Quantity' and enter the desired amount.
Learn more details about How to Add product Price and Stock
Step 15: Add product Variant (maximum 5)
Learn more details about How to Add Product Variant
Step 16: Add Wholesale Price (if have)
Learn more details about How to Add Wholesale Price

Step 17: Insert the product weight (in grams) & product Dimension (in cm)
Learn more about How to Add Product Weight & Dimensions
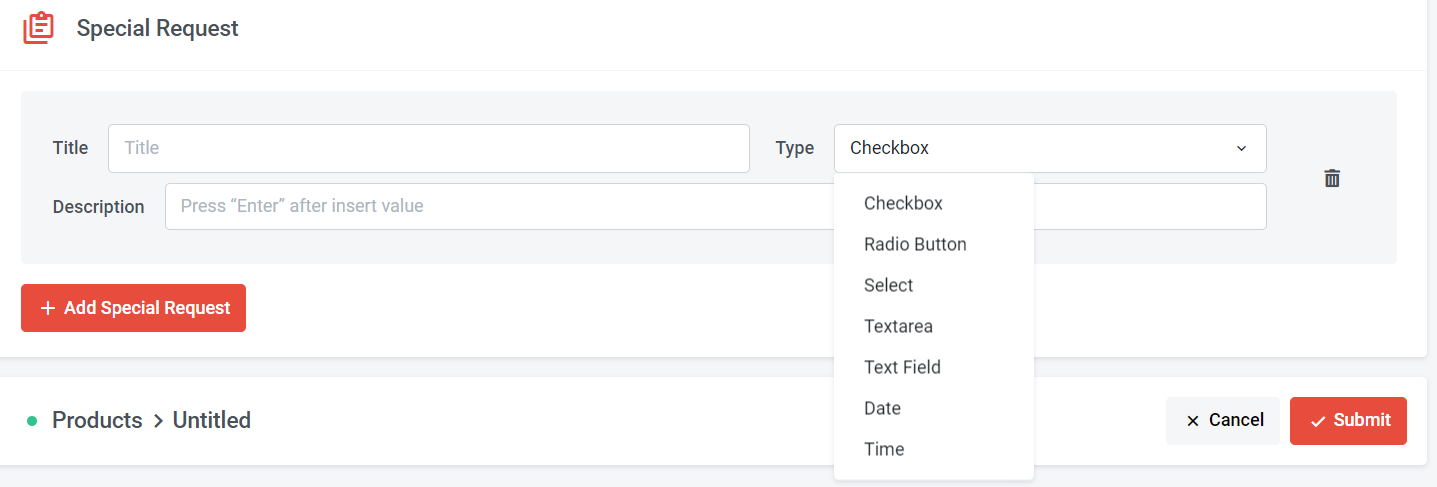
Step 19: Add special request (if have)
Learn more details about How to Add Special Request
Step 20: Click "Submit" to save
Section 3: How to Upload Multiple Products

Step 1: You can search "Add multiple product" in the search menu or
Go to Manage > Products > All Products
Step 2: Click "Add Product" button
Step 3: Click "Multiple" button
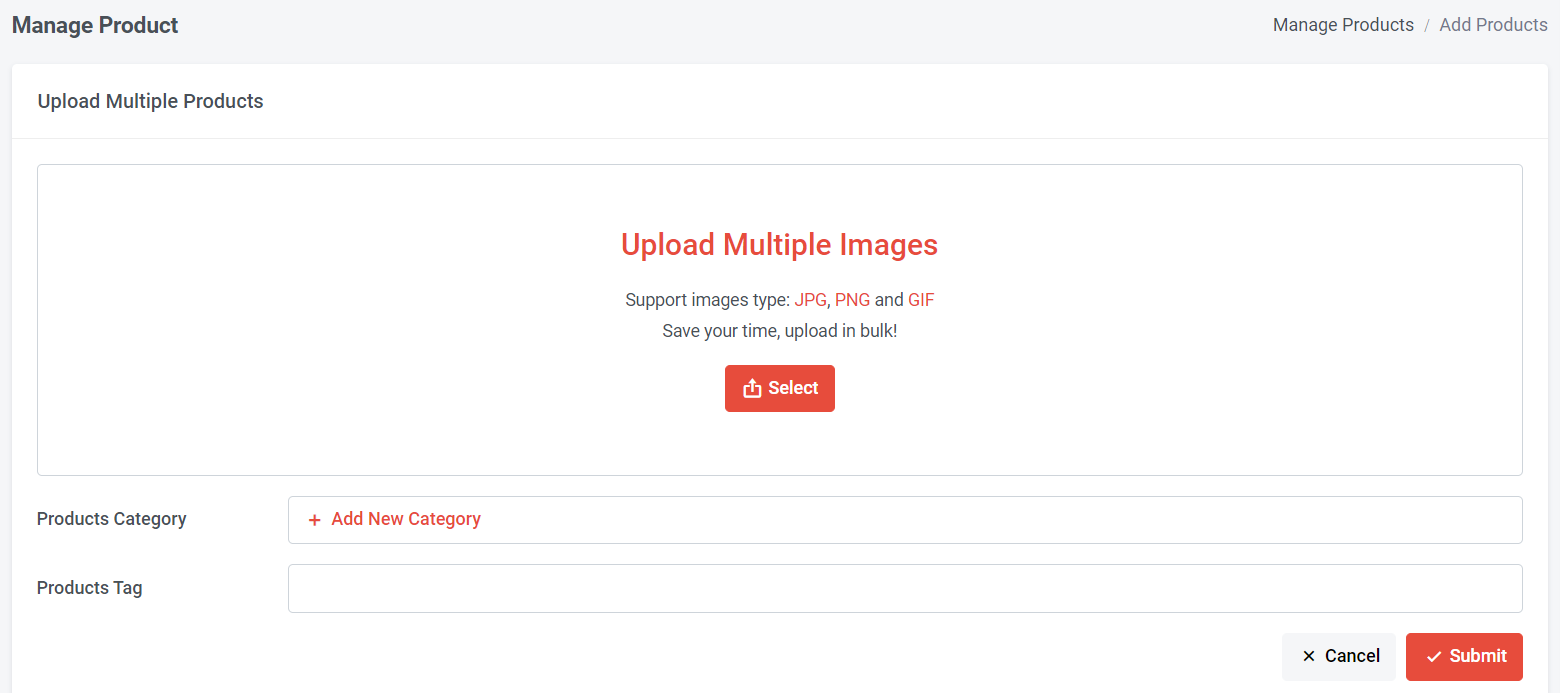
Step 4: Click "Select" > Choose the products > Click "Open"
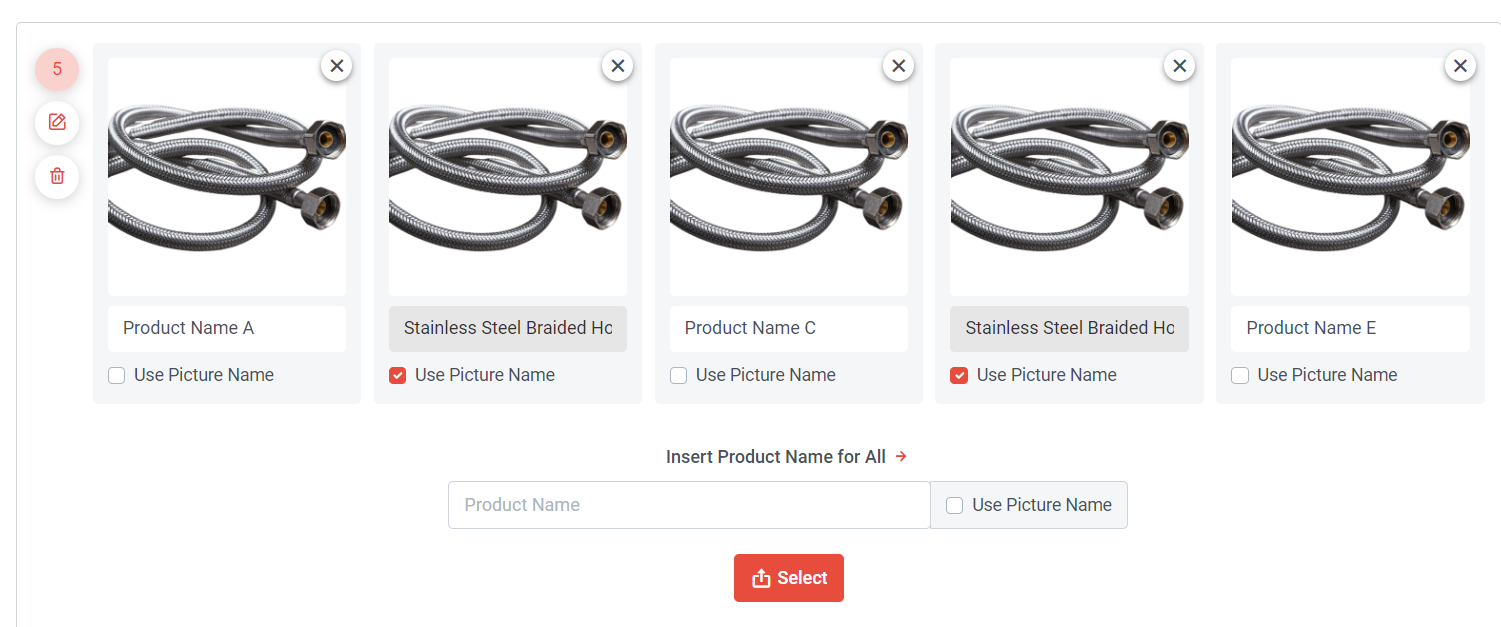
Step 5a: You can choose to insert the product name or tick "Use Picture Name" one by one
if tick "Use Picture Name", the product name will automatically be set based on your picture name.
or
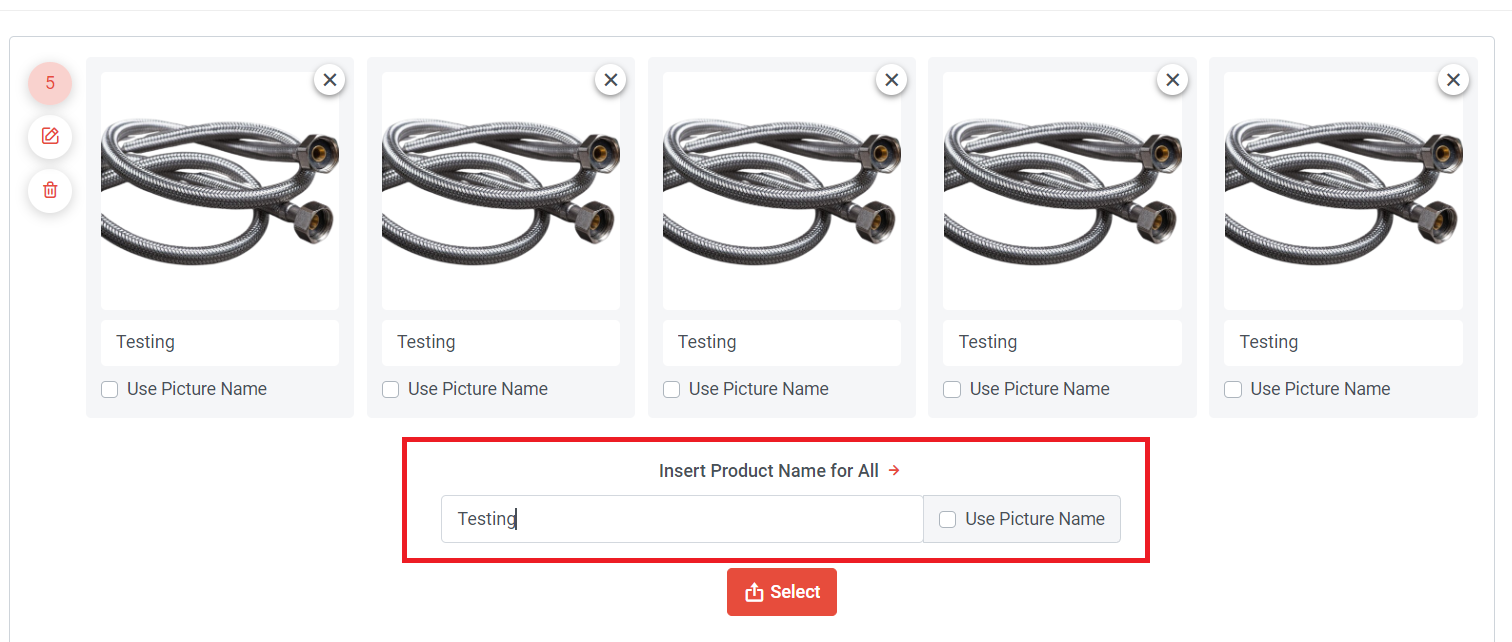
Step 5b: You can insert the product name for all
or
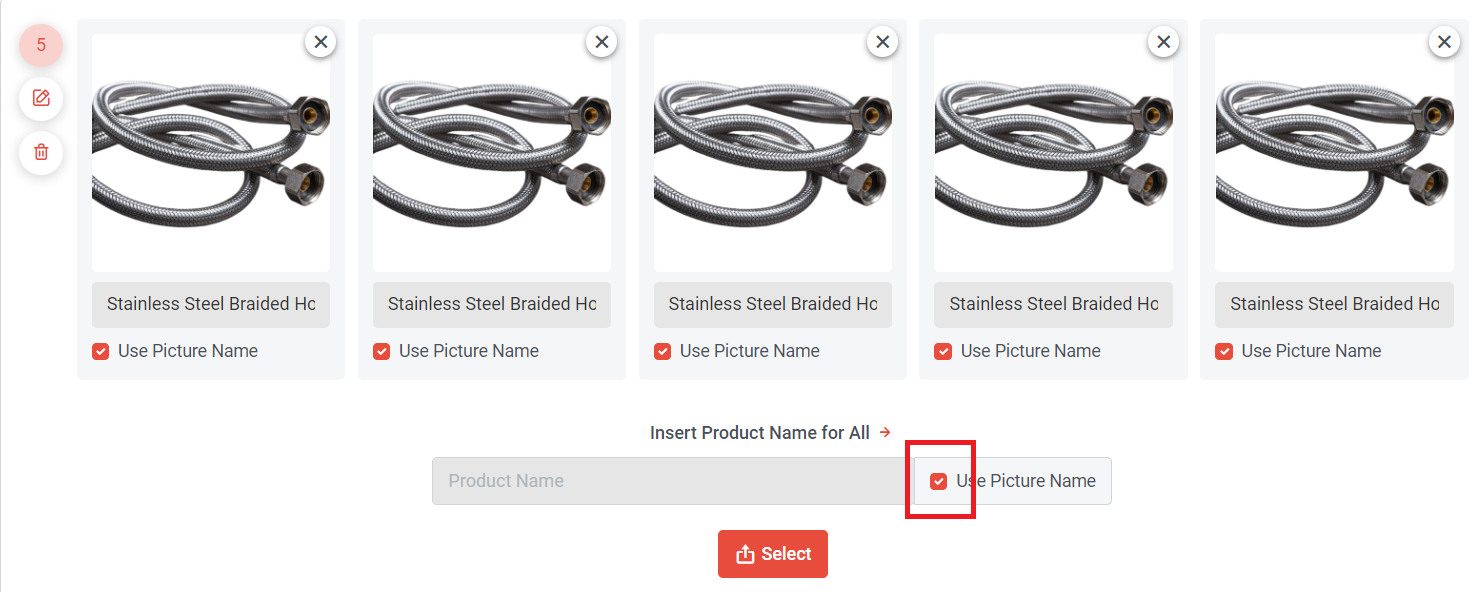
Step 5c: You can tick "Use Picture Name"
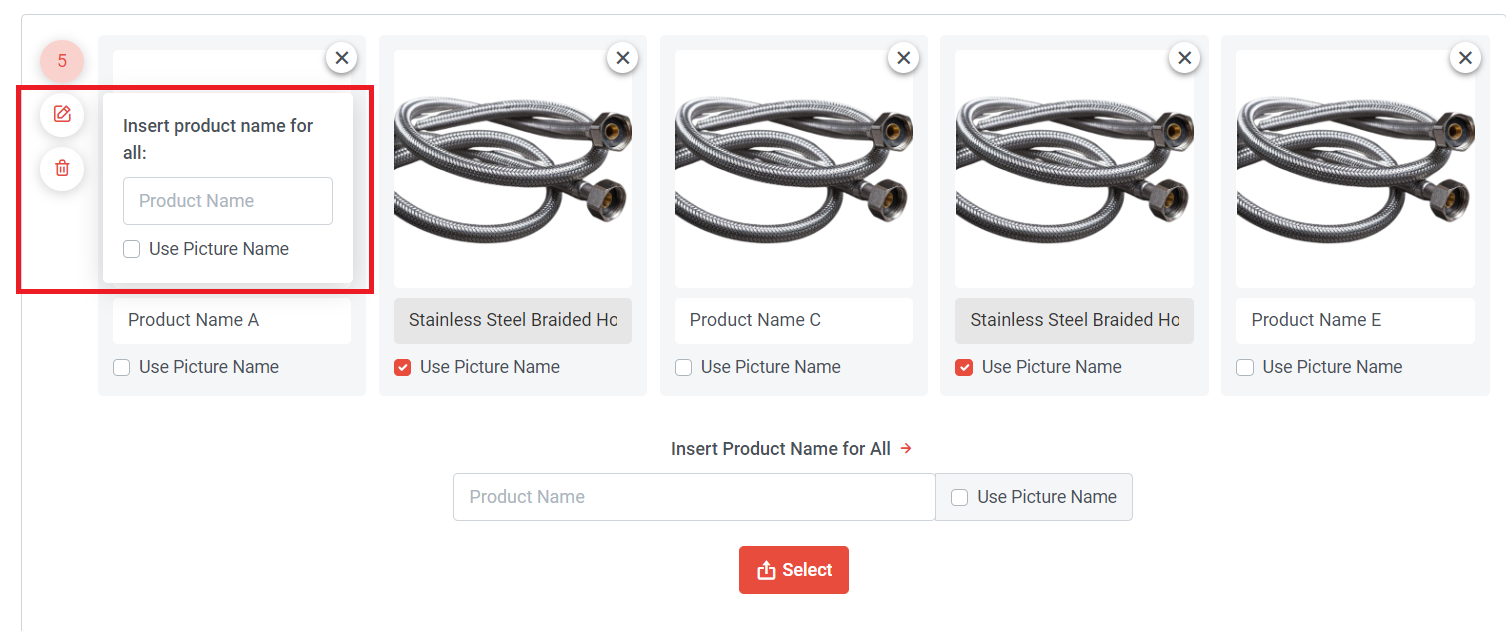
If you click you can also insert the product name or use the picture name as step 5b & 5c.
You can also click to delete all.

Step 6: Click "Add New Category" to add a category
Note: The product category is a mandatory field and must be filled in before you save.
Learn more details about How to Manage Product Category (Add, Edit, Delete, Sort)
Step 7: Fill in the tags (maximum 5 tags) > Press 'Enter' on your keyboard to save the tag; if not, it will not be considered saved.
Learn more details about How to Manage Tag (Add, Edit, Delete)
Step 8: Click "Submit"
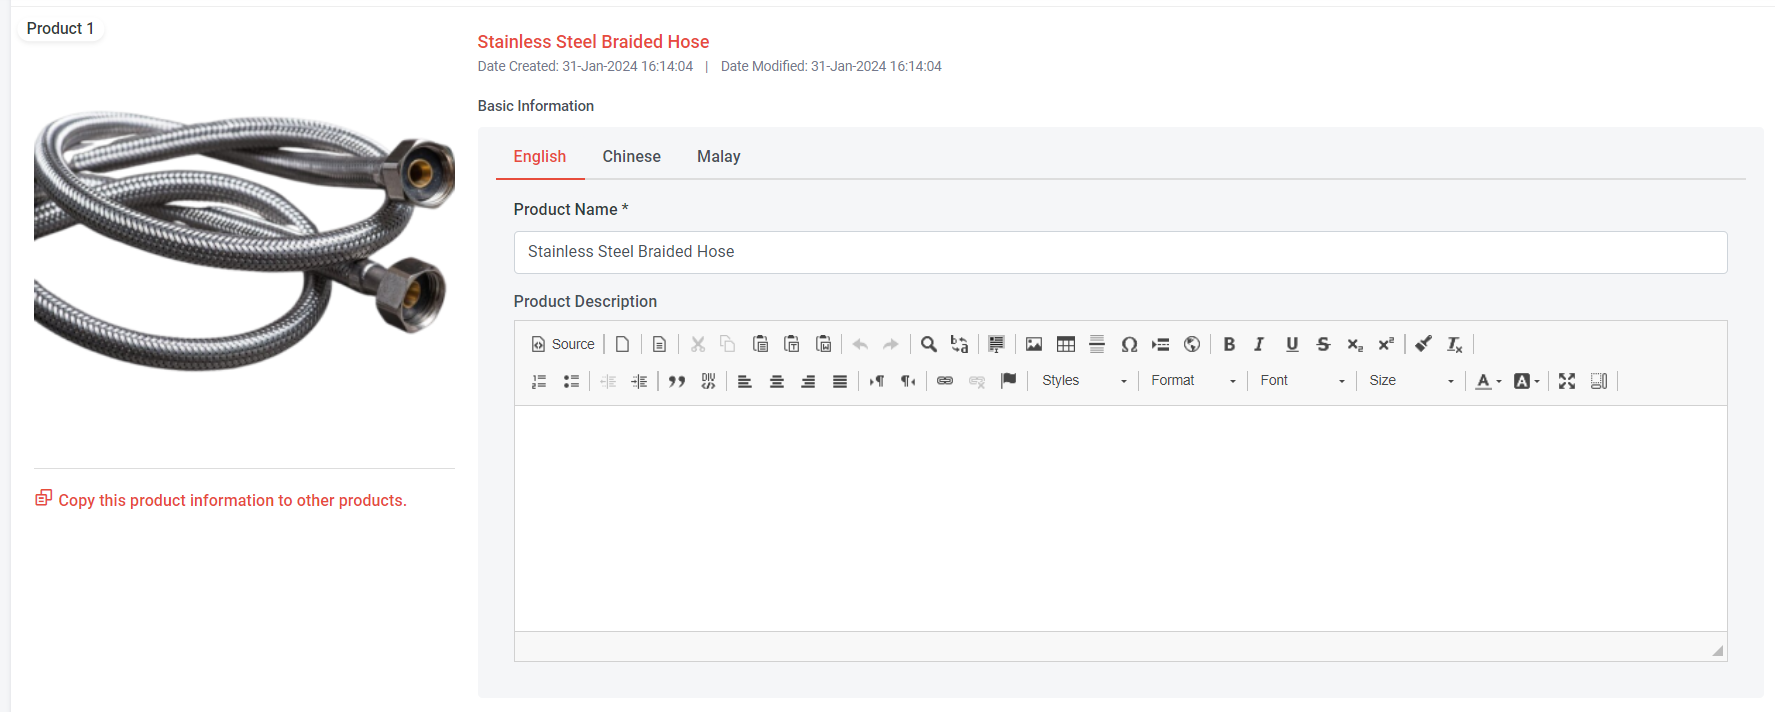
Step 9: You can edit the product name & add product description
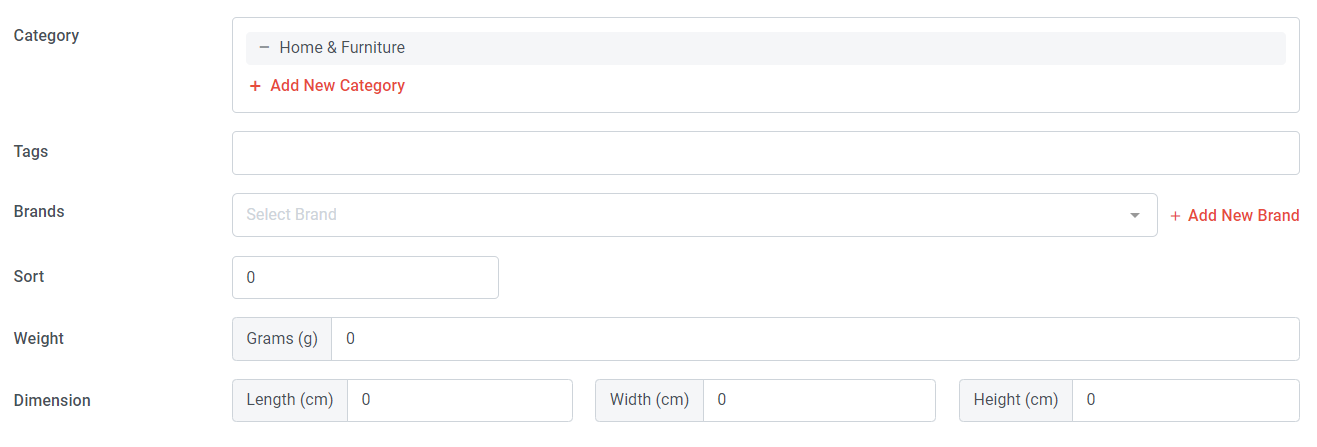
Step 10: Edit your product category or add a new category
Step 11: Edit product tags or add product tags (Press 'Enter' on your keyboard to save the tag; if not, it will not be considered saved.)
Step 12: Select Brand or Add New Brand (if have)
Learn more about How to Manage Brand (Add, Edit, Delete, Sort)
Step 13: Sort - if you want a certain product to show first, input a larger number
Step 14: Insert the product weight (in grams) & product Dimension (in cm)
Learn more about How to Add Product Weight & Dimensions
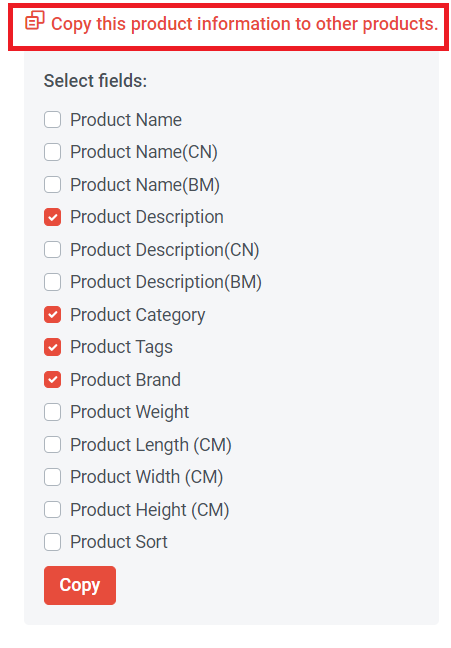
Step 15: If all these multiple upload products share identical information, you can streamline the process by clicking on 'Copy this product information to other products' select the fields and clicking "Copy". Once done, other products in this multiple upload will automatically use the same details, saving you time.
Step 16: Click "Submit" to save the products
If you wish to edit the product information, you can
Learn more about How to Edit Products / Duplicate Products
If you wish to add product price, you can
Learn more details about How to Add product Price and Stock