Select Categories
How to Sell on Facebook Live
August 7, 2024Section 1: Introduction
You just need to connect their Facebook pages and ready to go live and sell their products! Their shoppers can comment defined code to add the particular products into their cart, and they will receive a direct message with a checkout link for those products. They can also add multiple products and checkout at once, making their shopping experience even more convenient.
Section 2: How to access Facebook Live Plugin
Go to NMS side menu > Plugins Store > Search Facebook Live Commerce > Click plugin name > Click
Section 3: Connect with Facebook Live

Step 1: Click “here”
Step 2: Click “Click to Connect” > Link to Facebook
Step 3: Tick the Facebook Page > Click “Add”
Step 4: Back to Facebook Live Page
Section 4: Add product to sell on Facebook Live

Step 1: Go to Live Commerce > Live Product Set > Add “name” for new set > Click Submit

Step 2: Click to edit

Step 3: Click “Add Product”
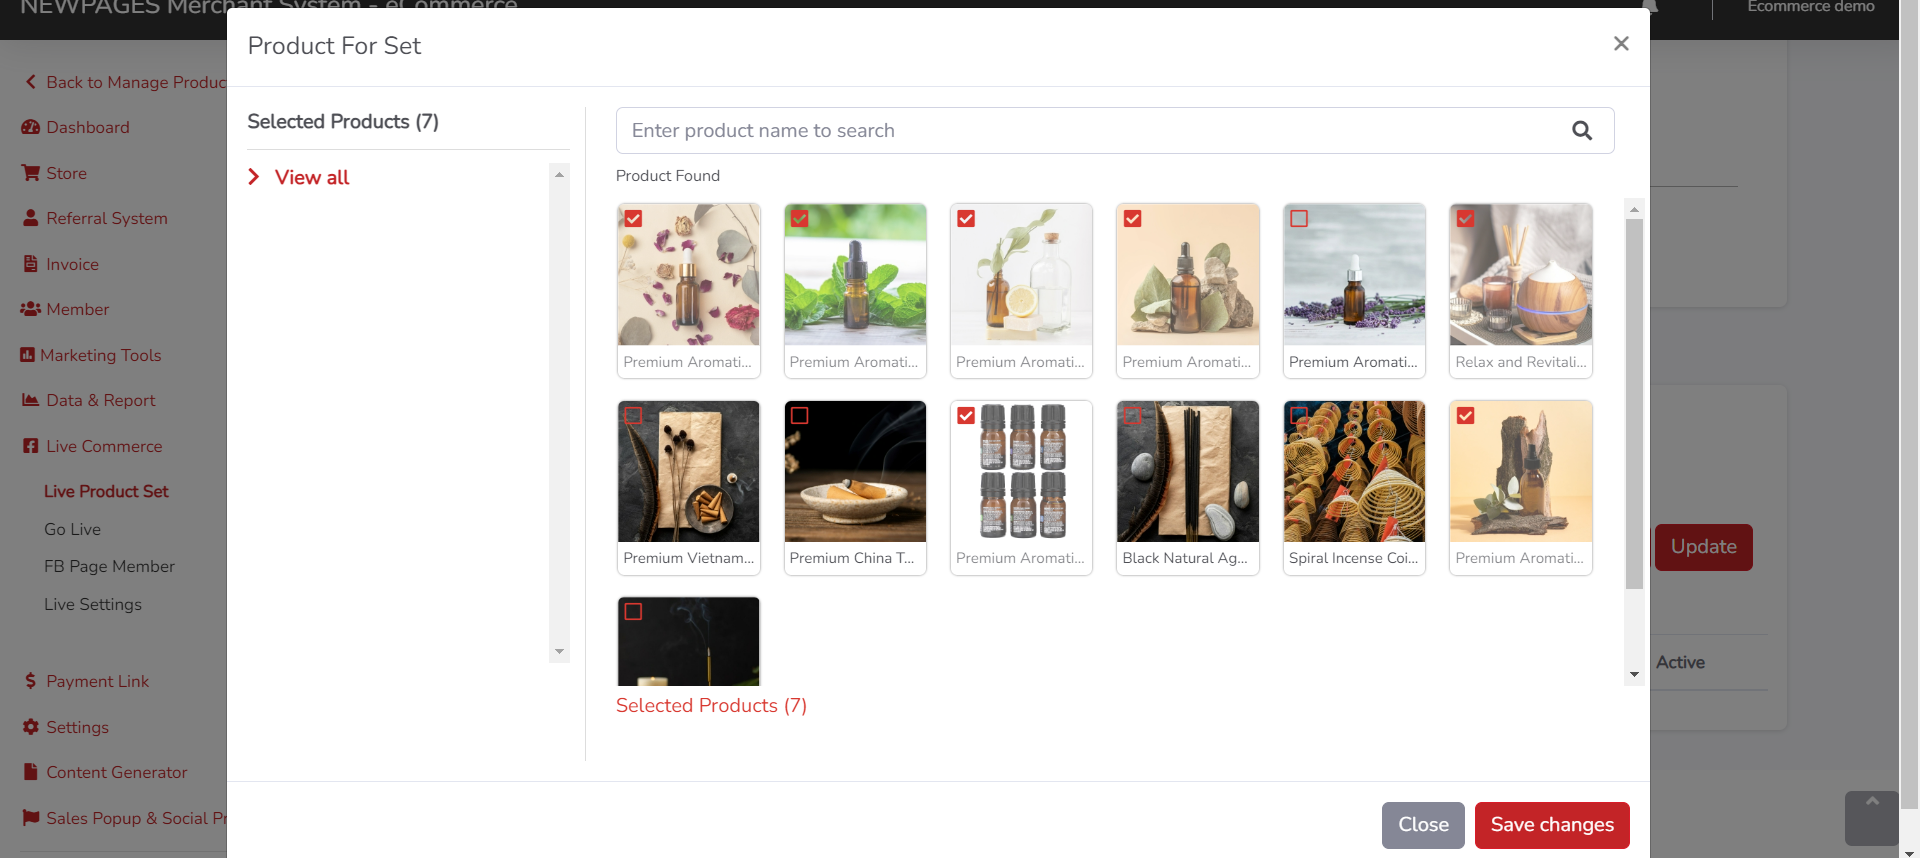
Step 4: Select Facebook Live products and save changes
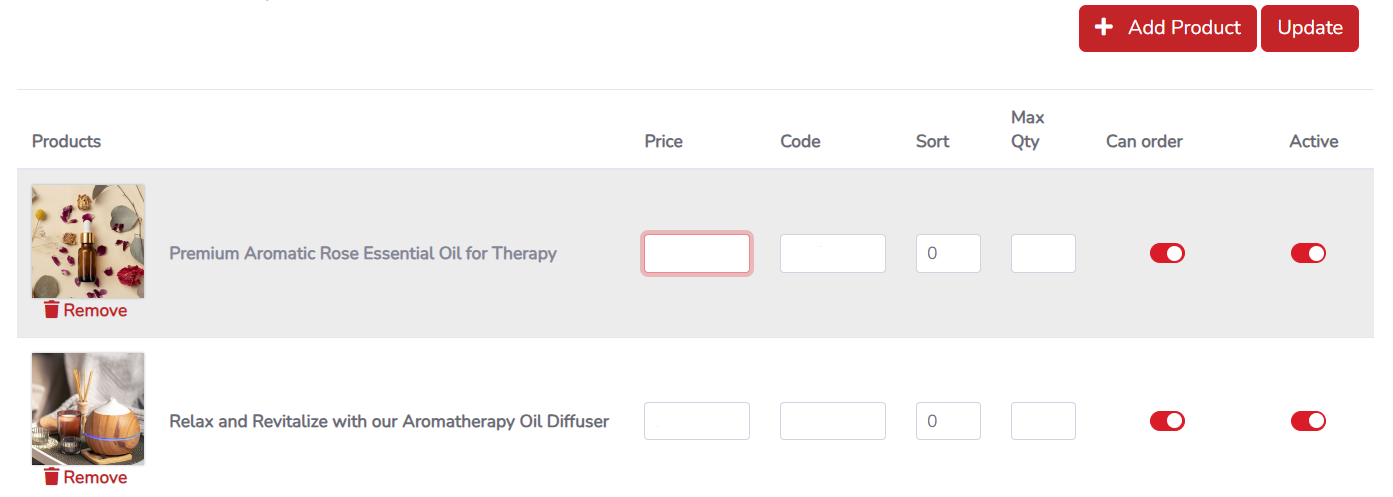
Few things can do adjustments:
a) Remove the unwanted product by clicking on Remove
b) Fill in the Product Price
c) Fill in Product code
d) Sort product (biggest number will show first)
e) Maximum Qty ( Control the maximum purchase limit for the products)
f) Can order or cannot order
g) If you don't certain products to be show on Facebook Live, you can turn off the "Active" button
Step 5: Once done add the information > Click Update

Section 5: Facebook Live Setting
Go to Live Commerce > Live Settings
a) Live Automated Message
You can customize automated responses during Facebook Live.
i) When customer comments to place order
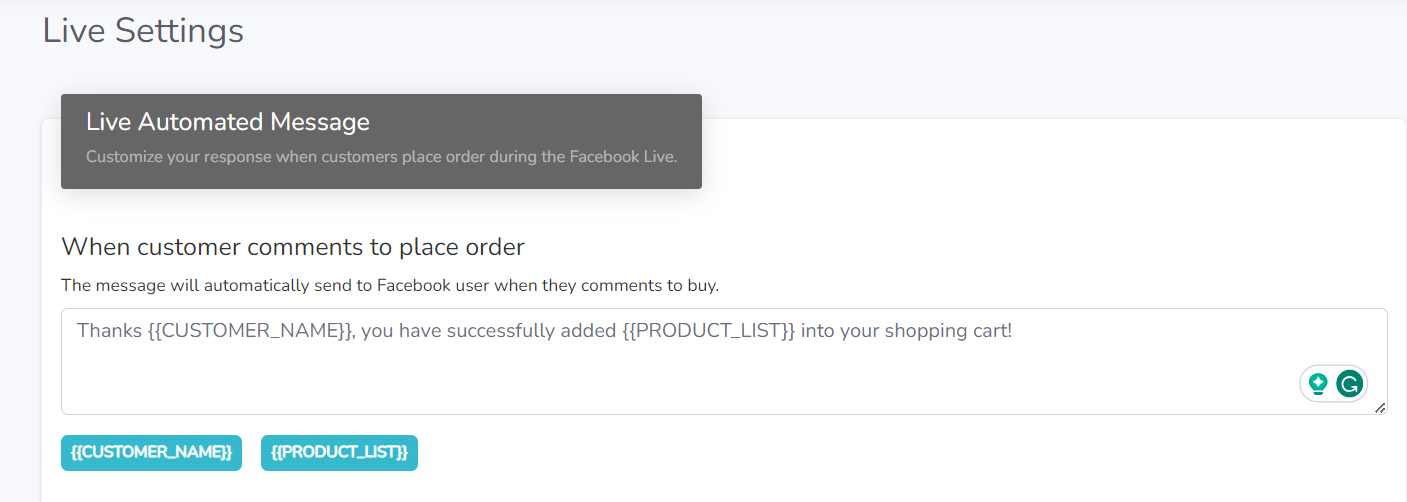
You can customize the wording and copy/paste variables {{CUSTOMER_NAME}} and {{PRODUCT_LIST}}.
These variables will detect the customer's Facebook name and the product they commented on, and send the information to buyers.
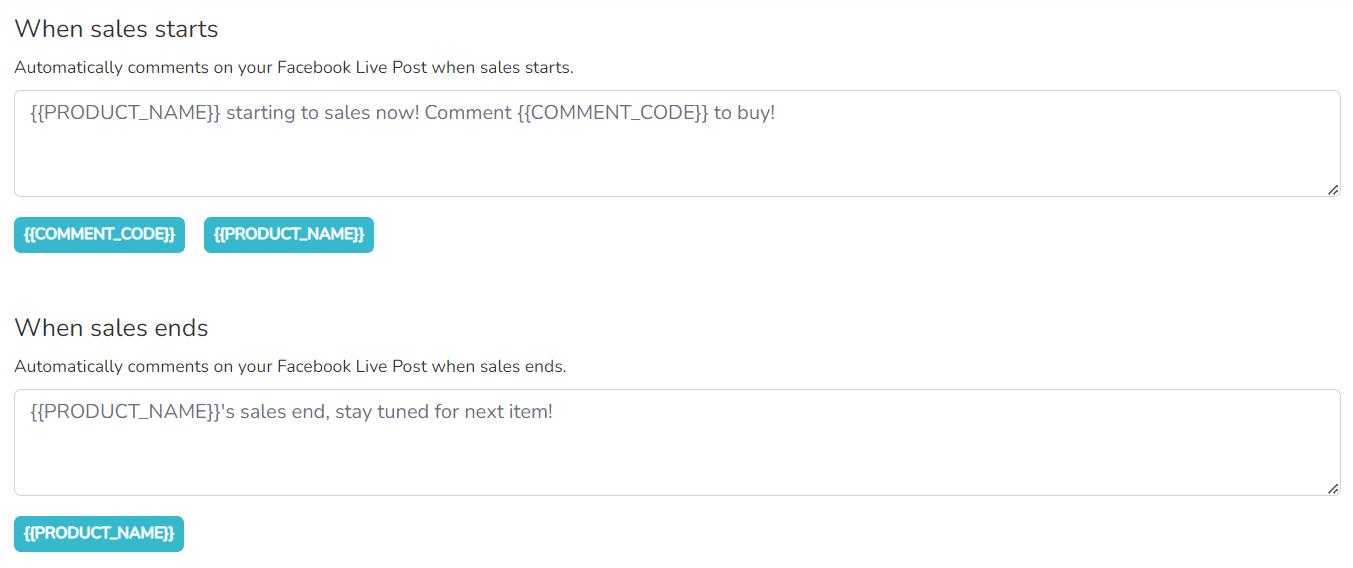
When sales start and end, the system automatically comments on the Facebook Live post.

Step 1: Set up your Facebook Live website domain
Step 2: Choose to allow or prohibit your customer to modify their orders & qty
Section 6: Create and run Facebook Live
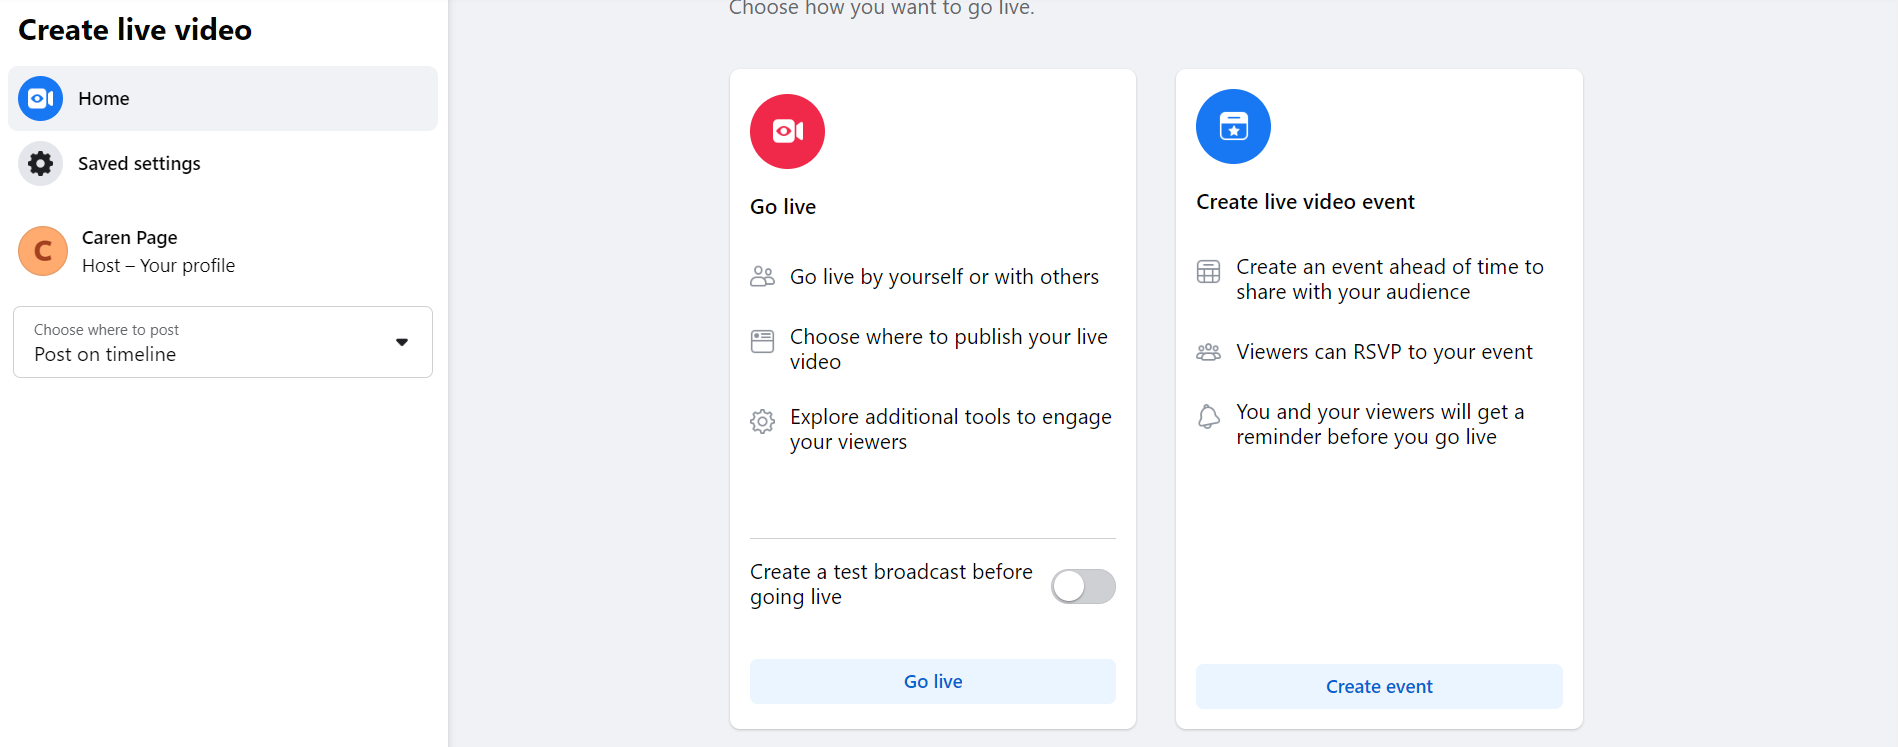
Step 1: Go to Facebook Page > Live Video > Choose how you want to go live.
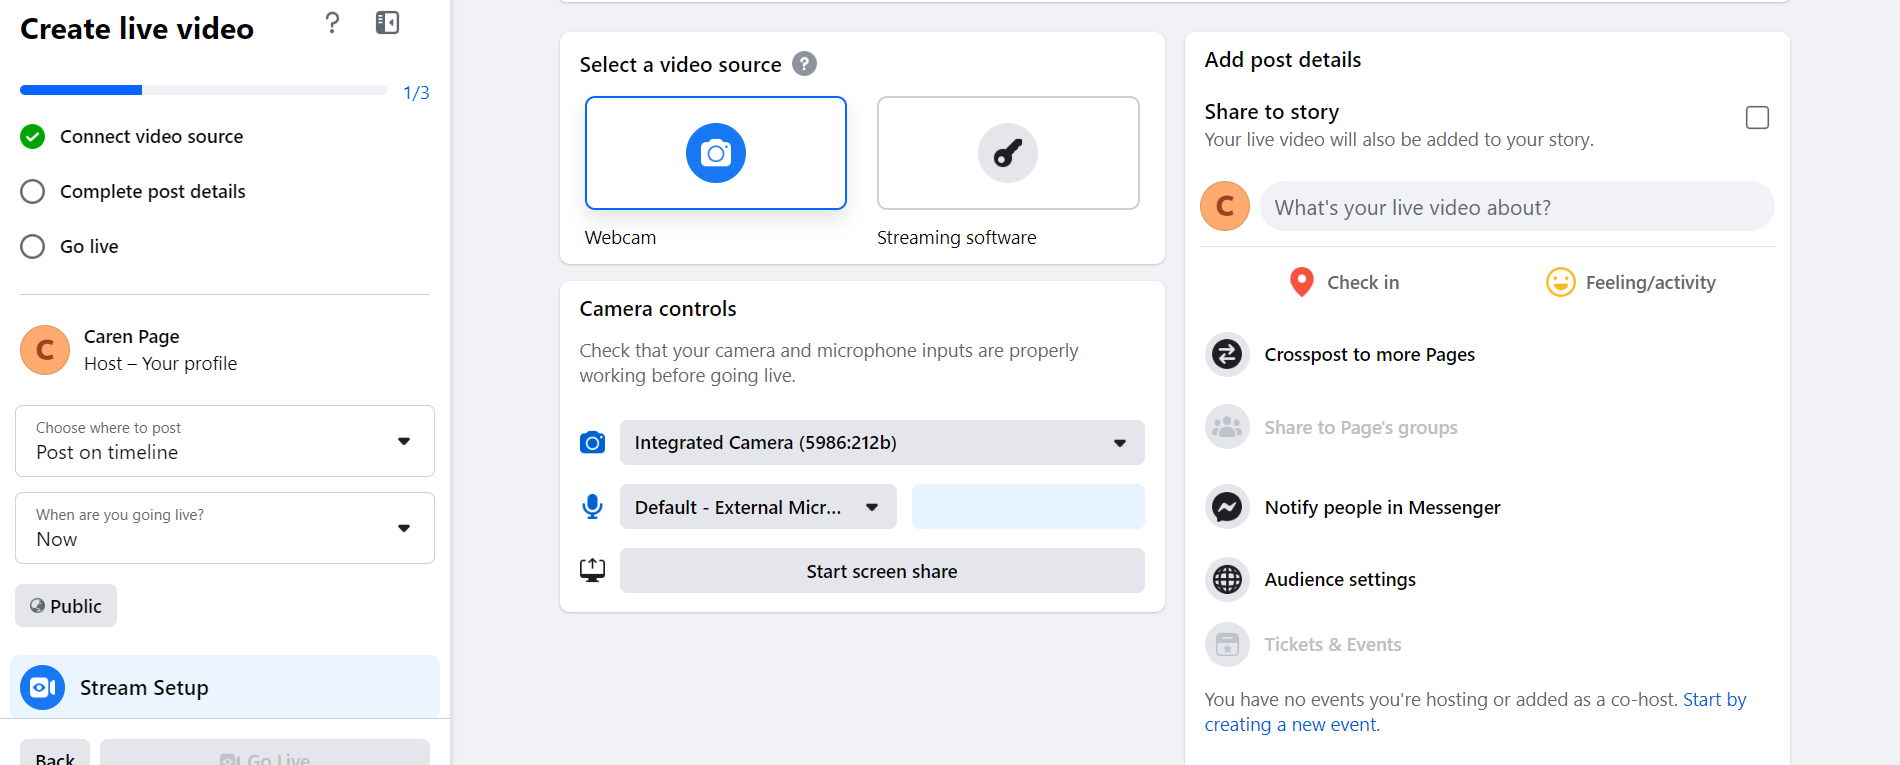
Step 2: Setting your video source, camera controls & complete post details and go live

Step 3: Go back NMS Facebook Live > Go Live > Click "Go to Live Room"
Section 7: Sell and end Facebook Live
You can manage control Facebook Live in Facebook Live Commerce Control Room
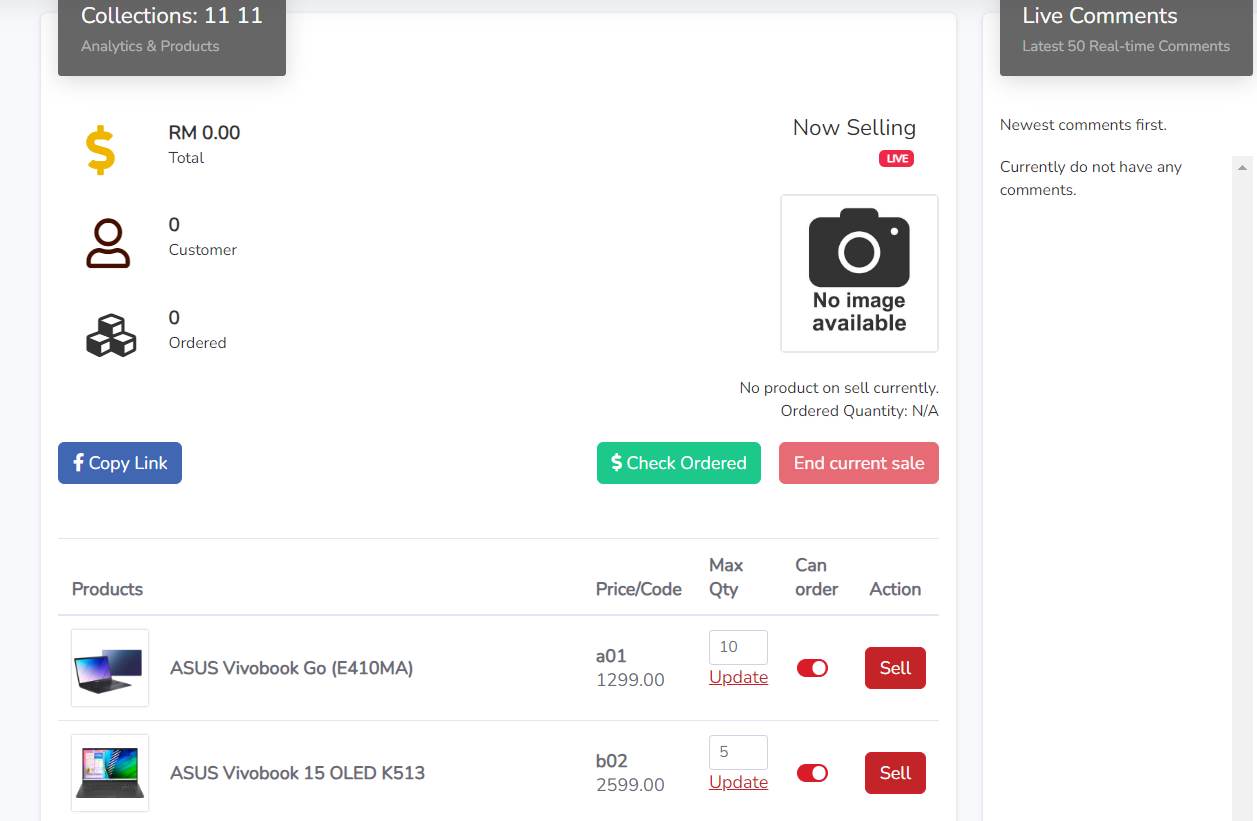
Step 1: Click “Copy Link” and share it with your audience.
Step 2: Check the product list, product code, and price. If you wish to add or edit items, you can do so in the “Live Product Set” section.
Step 3: If you wish to adjust the maximum quantity, update the new amount in the Max Qty field.
Step 4: Turn on “Can order.”
Step 5: Click the “Sell” button to start selling products. By doing this, system will automatically post a Facebook comment based on the settings of the Live Automated Message when sales start.

Step 6: If users wish to sell the next products, they can click 'End current sale' to end the current product sale, repeat step 5 and start selling the next products.

Step 7: When buyers comment on Facebook Live, the Live Comments on the right side will show the newest comments.
Step 8: When buyers comment with a keyword or product code on Facebook Live, an order will be auto-created and they will receive a purchase link via Messenger.
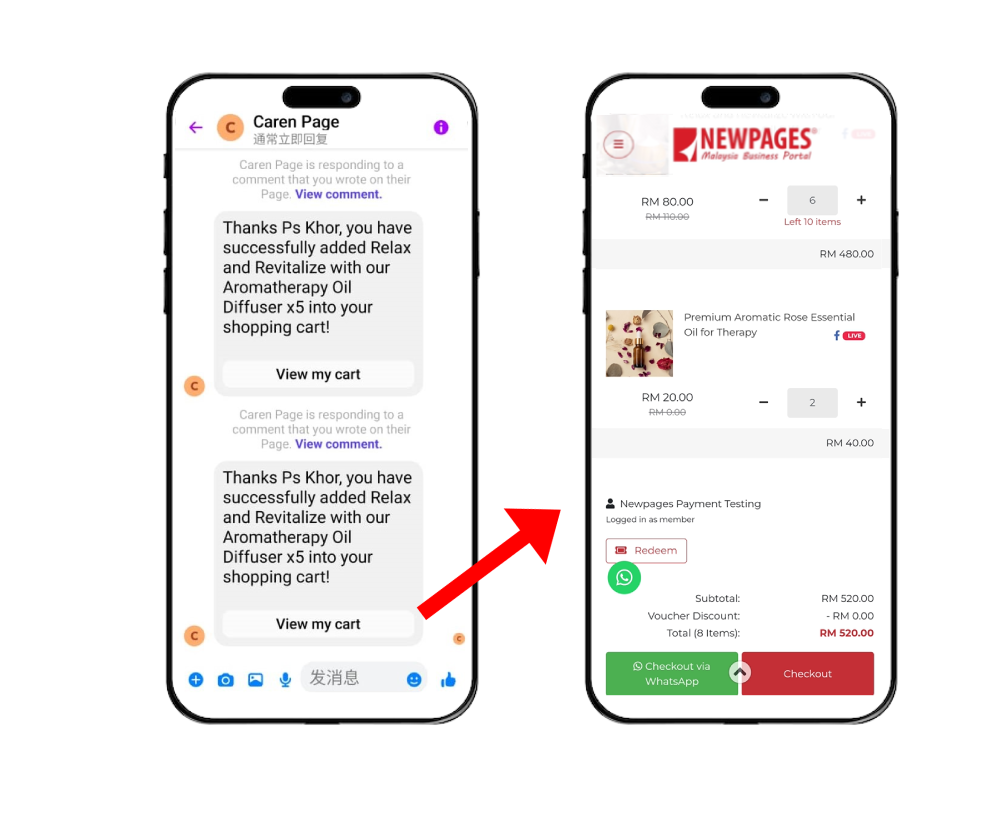
Step 9: The buyer can click "View my cart" to proceed with checkout and make payment.
Section 8: Facebook page member
Go to Live Commerce > FB Page Member
You can check which buyer (with their FB profile name), what item they commented on, and the quantity and amount they purchase.
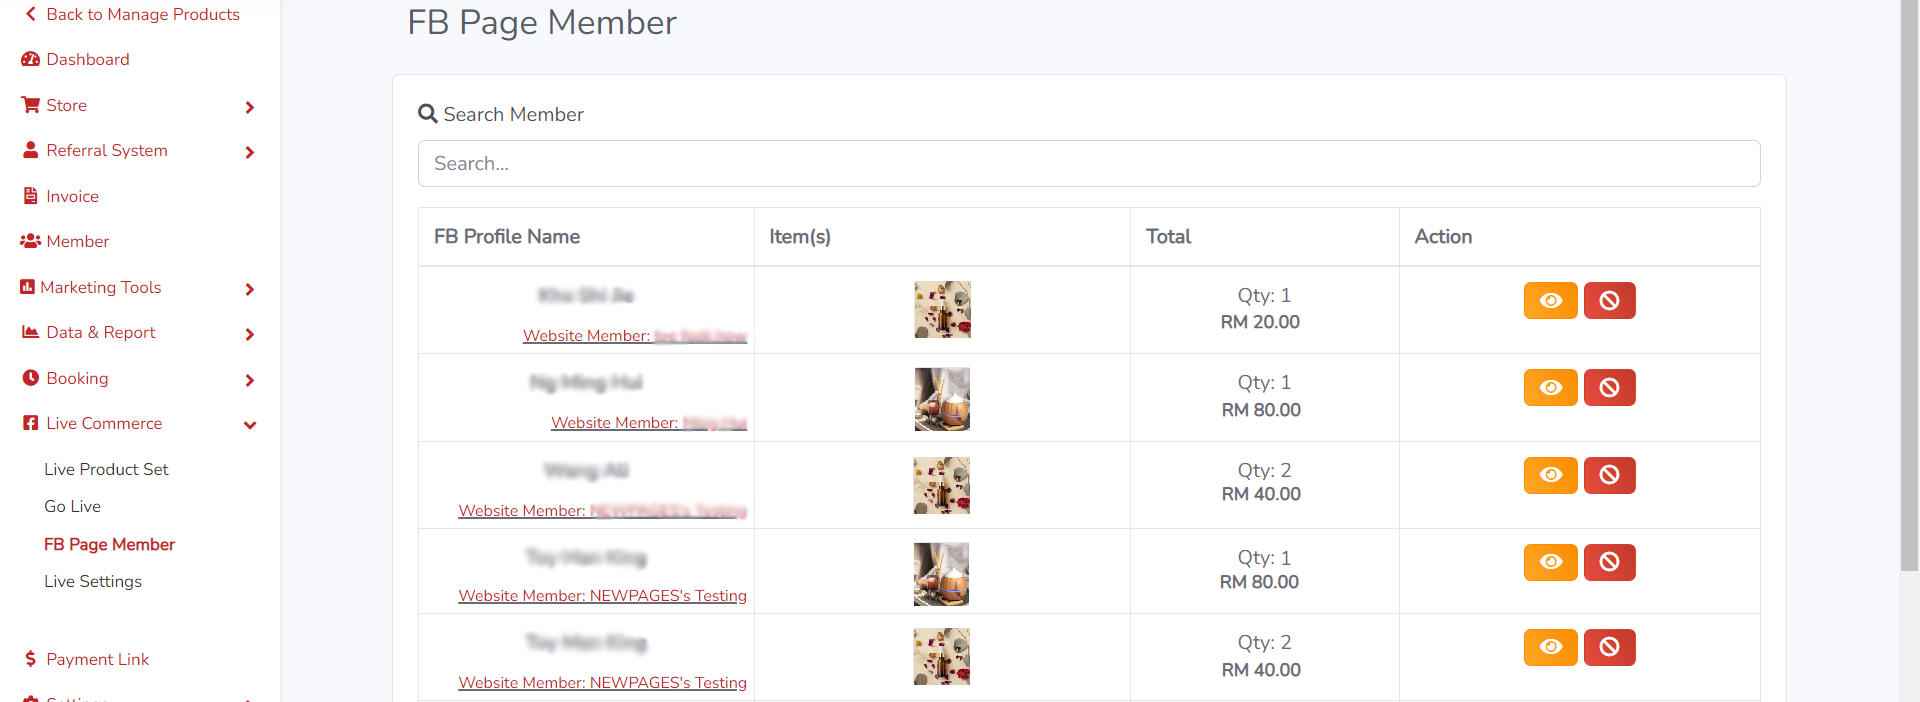
If you find out someone messing with your Facebook Live, you can ban them to purchase by clicking on icon

Once click icon will show your cart details.
You can click "View Cart at website" to redirect to the customer checkout page.
You can adjust the Max Purchase, Unit Price, and Quantity, or remove products from the cart.
After making adjustments, remember to click "Update Cart."