Select Categories
How to Add Special Request
March 5, 2026Section 1: How to Add Special Request
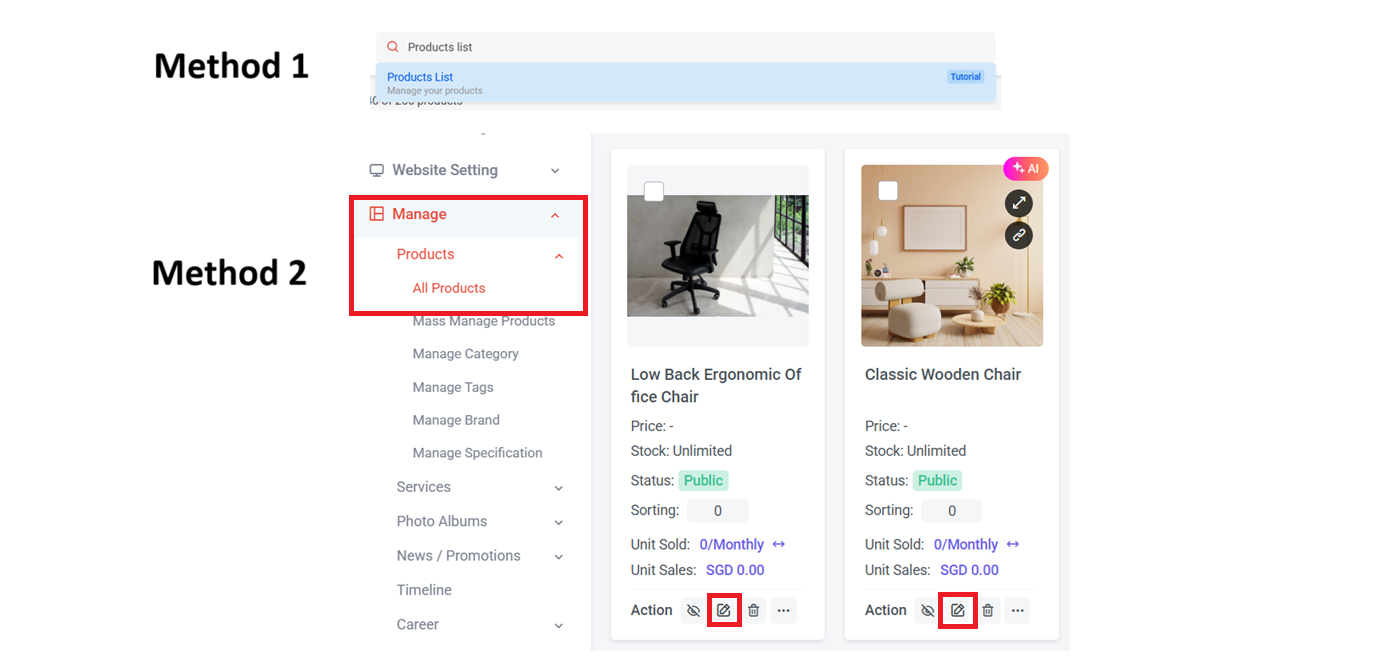
Step 2: Here are the ways to access the products list page:
Method 1: Search "Product List" in the search menu bar at the top of NMS
Method 2: Go to NMS side menu > Manage > Products > All Products
Step 3: Select the Product that you wish to edit and click
Step 4: Scroll to Special Request


Section 2: Types of Special Request
There are 7 types of special requests to choose from:
1) Checkbox: Commonly used in forms to enable users to select multiple options.

Fill in the title & description (Remember to press "Enter" on your keyboard after inserting the value).
Here is the sample:

2) Radio Button: Commonly presents a set of options, and users can choose only one option from the group.

Fill in the title & description (Remember to press "Enter" on your keyboard after inserting the value).
Here is the sample:

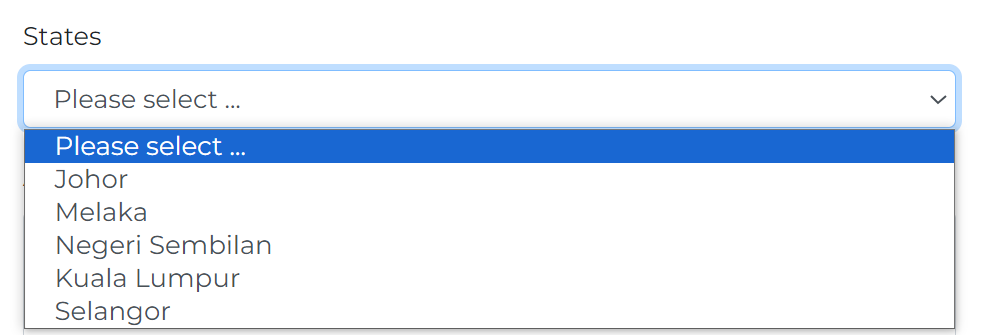
3) Select: Commonly present as a dropdown list, allows users to choose a single option from a menu of choices, offering a space-efficient solution for presenting multiple options, particularly when dealing with long lists or limited interface space.

Fill in the title & description (Remember to press "Enter" on your keyboard after inserting the value).
Here is the sample:
4) Text Area: Commonly used as an input element that allows users to enter and edit multiple lines of text. It is useful when users need to provide longer pieces of information, such as comments, descriptions, or messages.

Fill in the title & description
Here is the sample:

5) Text Field: Commonly used as an input element that allows users to enter and edit a single line of text. It is suitable for capturing relatively short pieces of information, such as names, email addresses, or other alphanumeric data.

Fill in the title & description
Here is the sample:

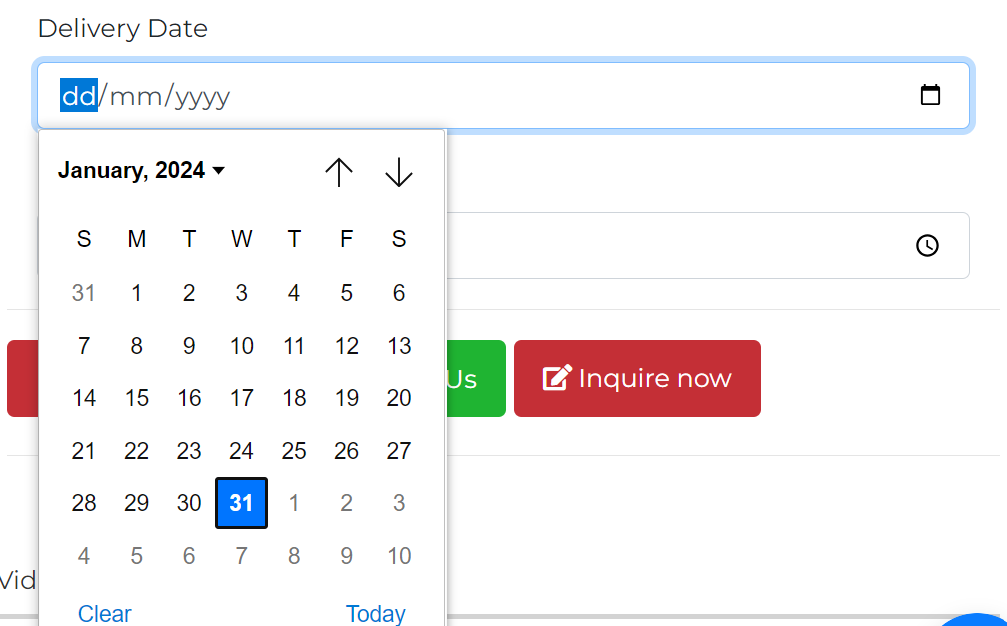
6) Date: Allow users to choose specific date

Fill in Title
Here is sample
7) Time: Allow users to select a specific time.

Fill in Title
Here is sample

Section 3: How to Apply the Same Special Request to All or Selected Products

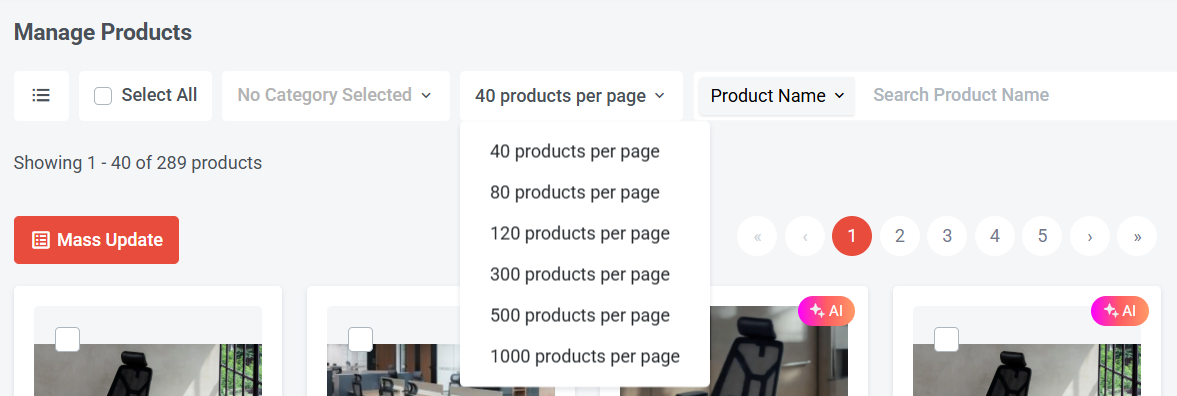
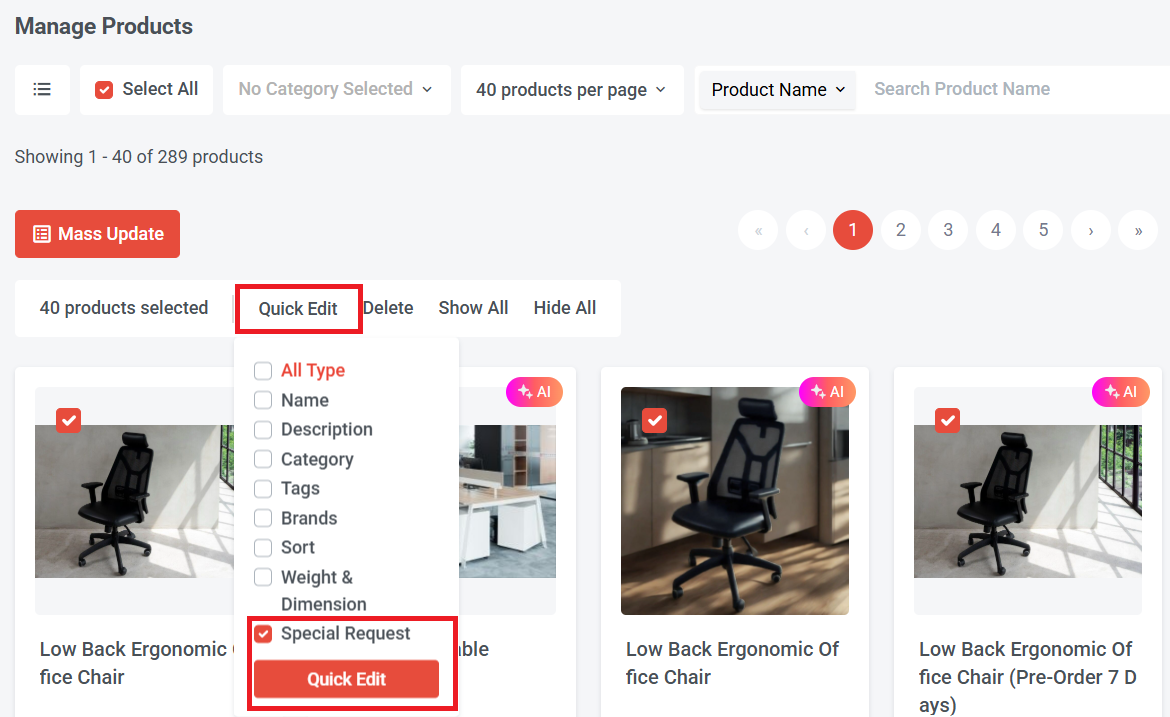
Step 2: Once you have selected the products, click "Quick Edit."
Step 3: Select "Special Request" and click "Quick Edit."
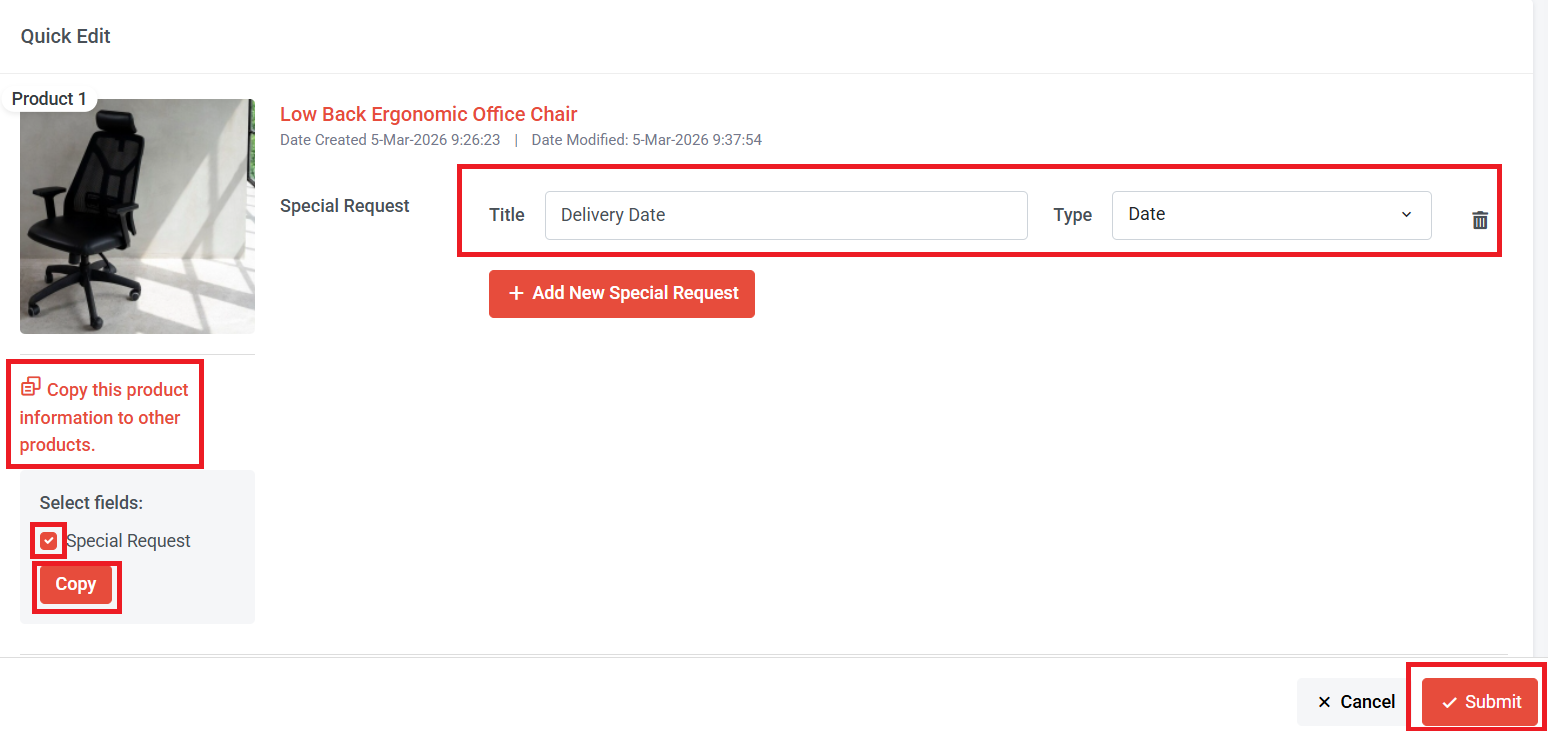
Step 4: Click + Add New Special Request.
Step 5: Choose the types of special requests and complete the settings.
Step 6: Click "Copy this product information to other products," tick the "Special Request" box, and then click "Copy."
Once this step is complete, all the selected products will have the same special request.
Step 7: Finally, click "Submit" to save.