Section 1: Introduction
e-Invoice Submission Integrated with LHDN
The E-Invoice Request feature enables direct integration with LHDN via API, allowing seamless invoice submission and tracking.
Features of E-Invoice Request:
- Direct LHDN e-Invoice API Integration
- After filling in buyer data & item classification, the system will auto submit to the MyInvois Portal
- Real-Time Invoice Status Tracking (Validated / Rejected / Pending)
This feature is only available for the E-commerce Pro package.
Section 2: How to Setup E-Invoice Request
Step 1: Log in to the MyTax portal: https://mytax.hasil.gov.my/
Step 2: Navigate to MyInvois from the top menu.
Step 3: Click “View Taxpayer Profile” at the top-right corner.
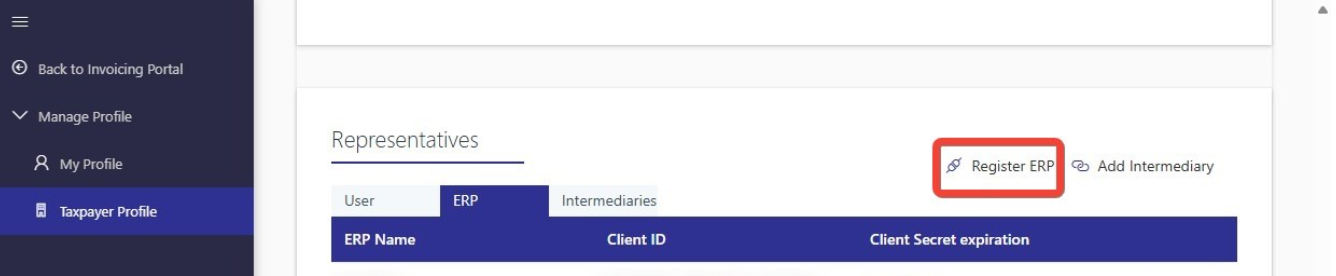
Step 4: Scroll down to the Representatives section and click “Register ERP”.
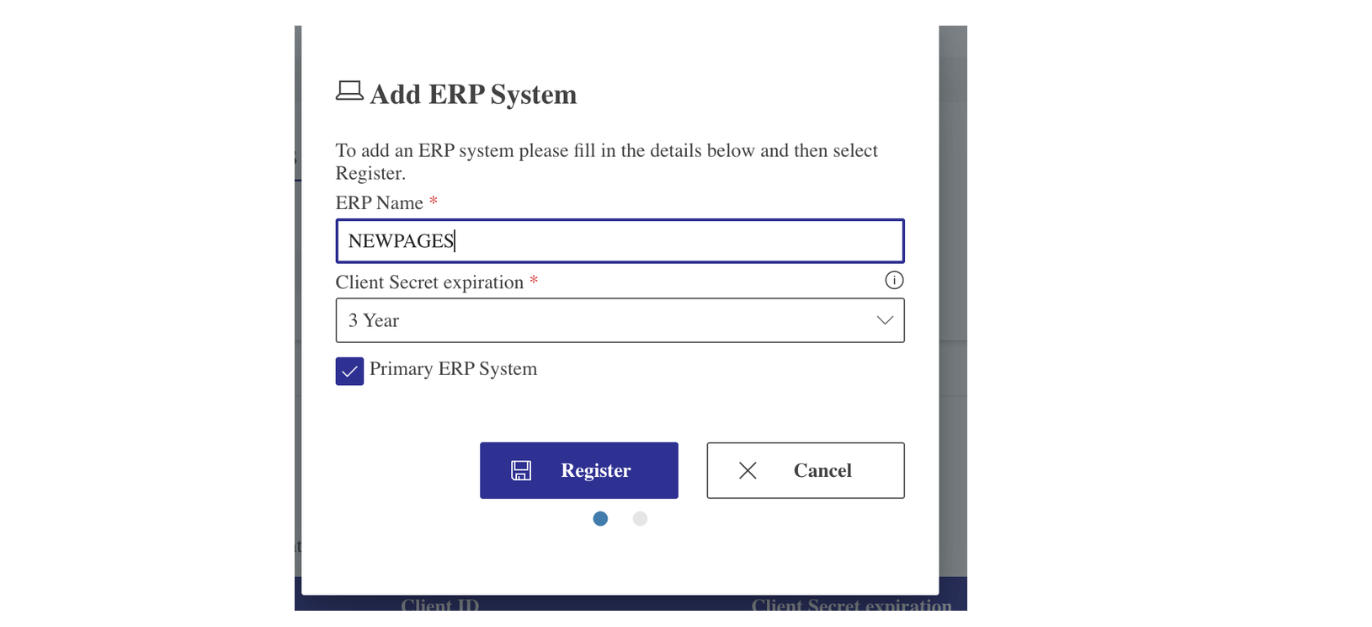
Step 5: Fill in the required details:
- ERP Name: NEWPAGES
- Client Secret Expiration: Select 3 Years
Step 6: Once done, click "Register"
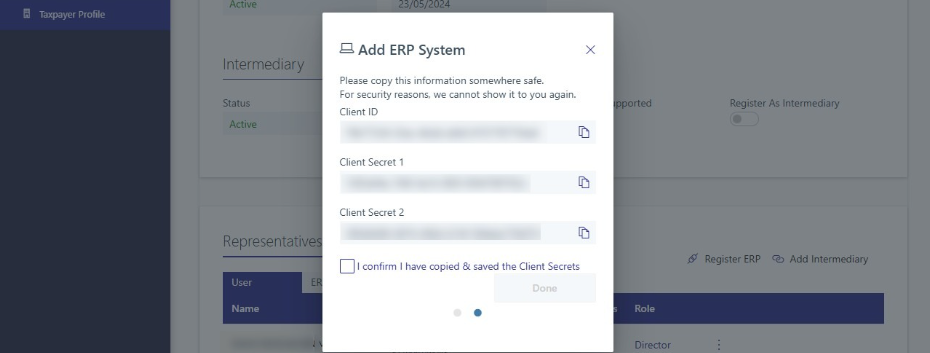
A dialog box will appear showing the Client ID and Client Secret. Please copy and save them securely. This information will be needed later to set up in our NMS system.
Step 7: Copy and securely save the following credentials:
- Client ID
- Client Secret 1
- Client Secret 2
Step 8: Tick the checkbox: “I confirm I have copied & saved the Client Secrets”.
Step 9: Click “Done”.
Important: Do not share your Client ID or Client Secrets with unauthorized persons.
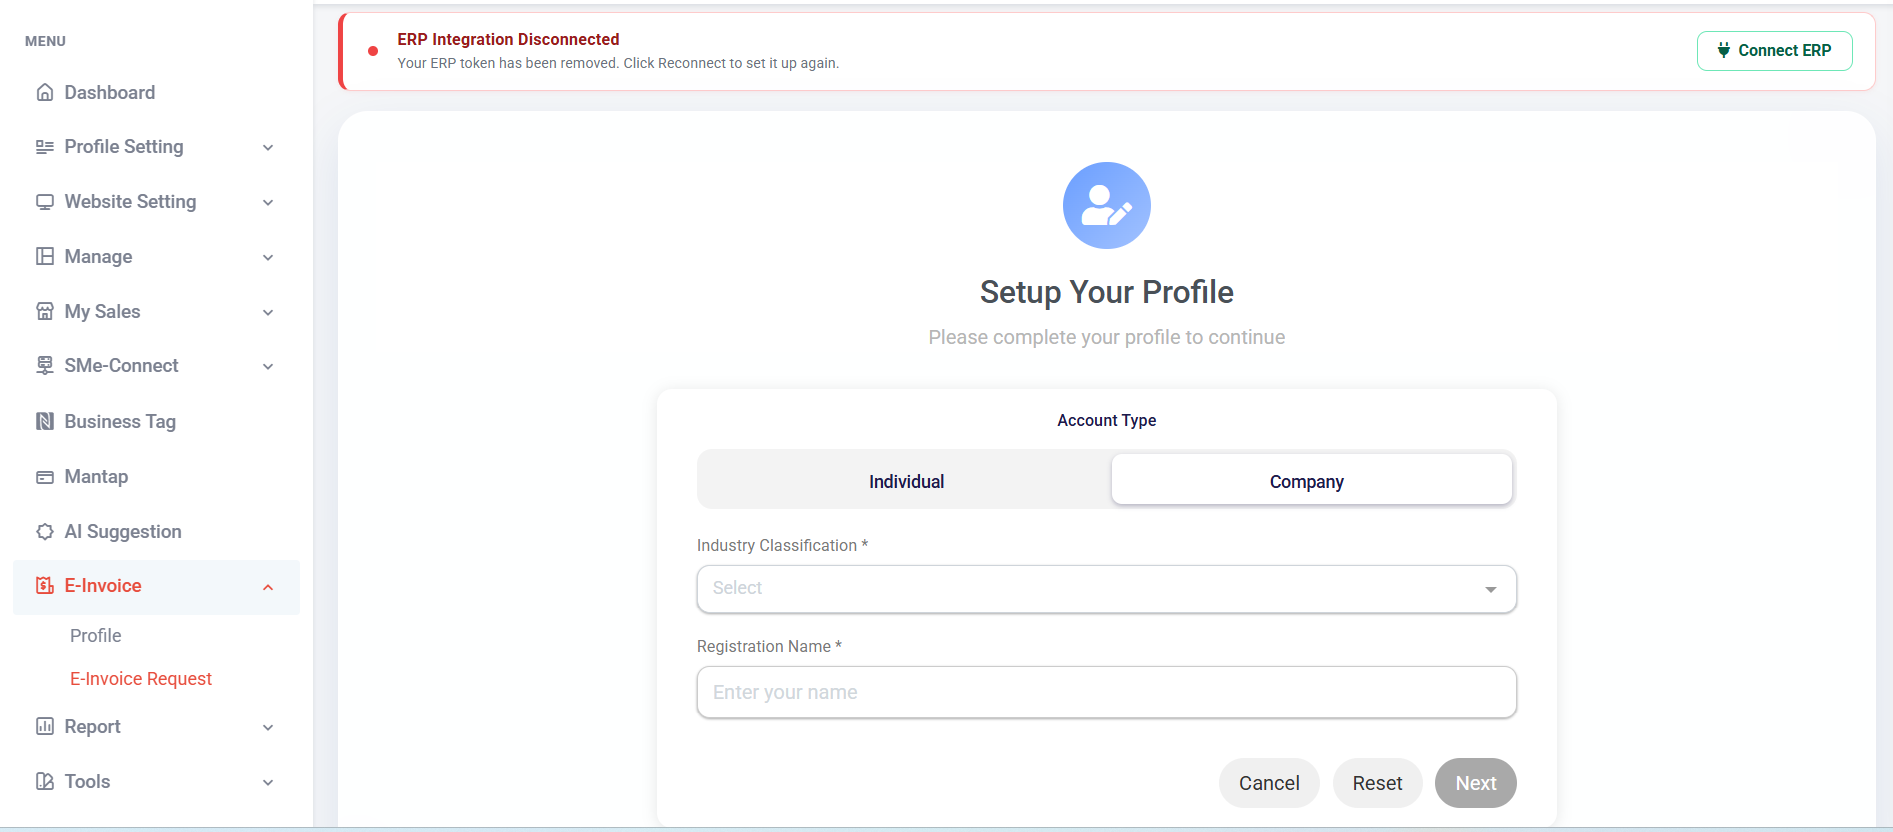
Step 10: Go to NMS System → E-Invoice (Left side panel) → E-Invoice Request
Note: Before accessing e-invoice Request, you need to make sure the E-Invoice plugin is activated.
Step 11: Set up your profile (Setup account type, contact information, address information, and Company and Individual Information). Once completed, click Submit.
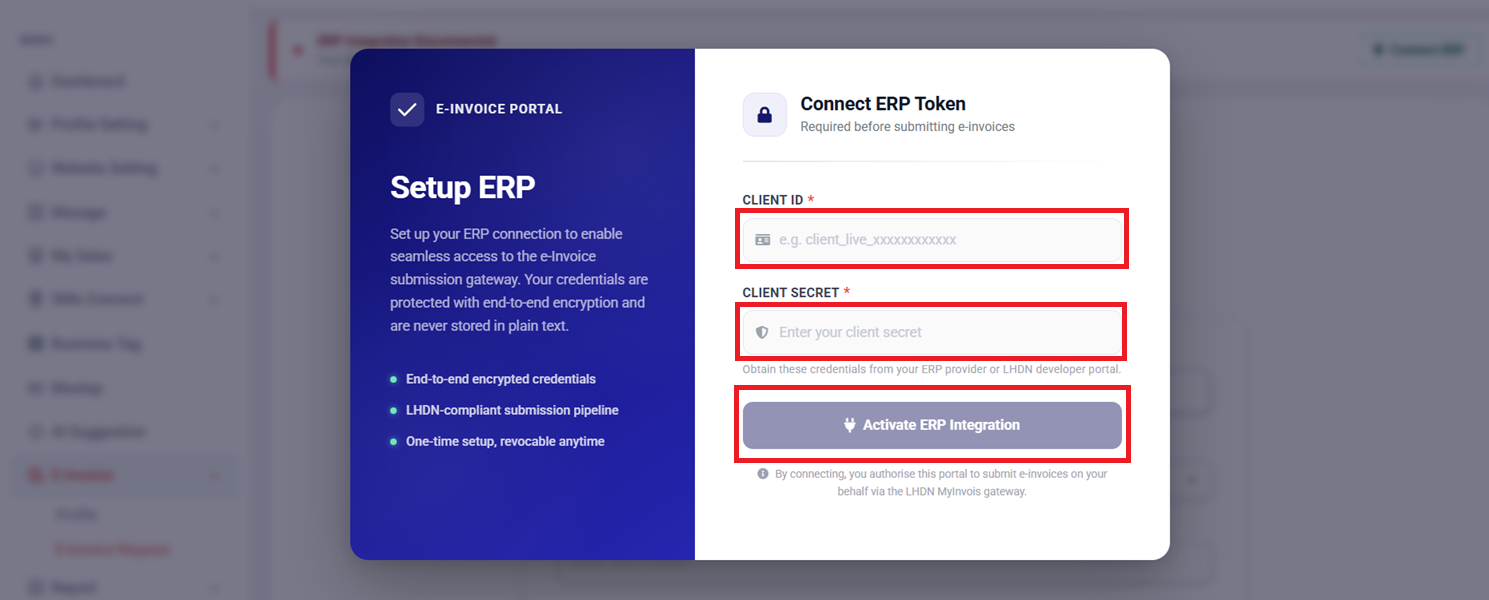
Step 12: Click Connect ERP
Step 11: Paste Client ID & Client Secret 1
Step 12: Click “Activate ERP Integration”.
After completion, the status will show ERP Integration Active.
If you want to disconnect your ERP integration, you can click ‘Revoke Access’ to remove the ERP token. You will need to set it up again to continue submissions.
Section 3: How Buyer Request for E-invoice
When a new order is placed, the buyer can fill in the required information after making the payment to request an e-invoice.
There are two payment methods and their respective situations:
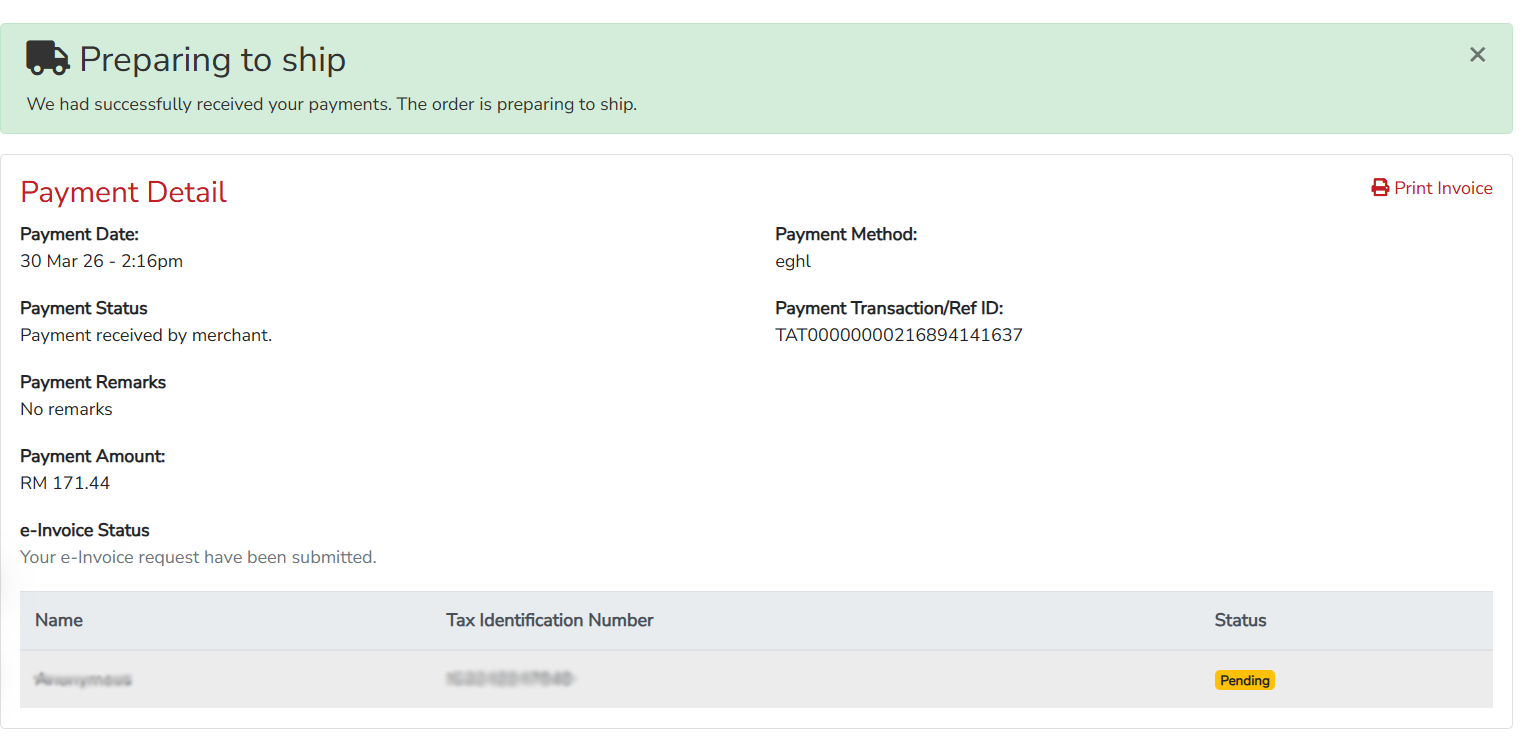
Situation 1: Buyer makes payment via the payment gateway
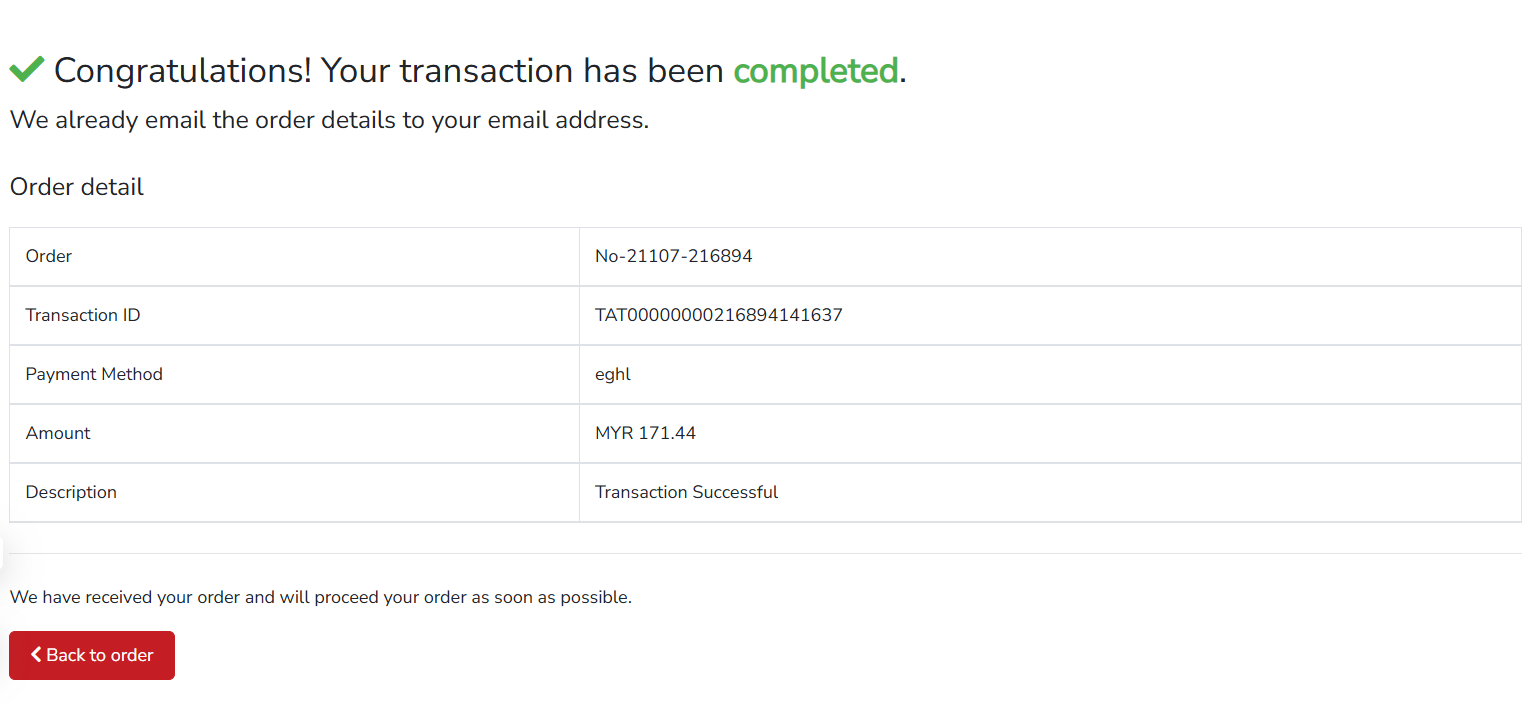
Step 1: Once the buyer has completed payment via the payment gateway, they need to click 'Back to order.
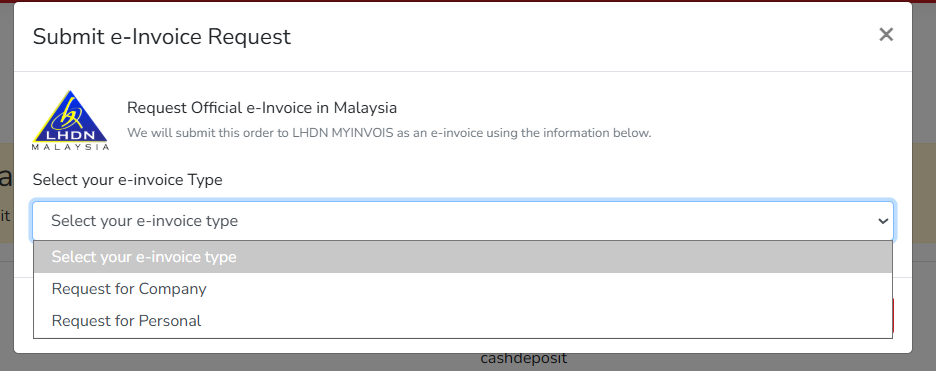
Step 2: Click "Request for e-invoice"
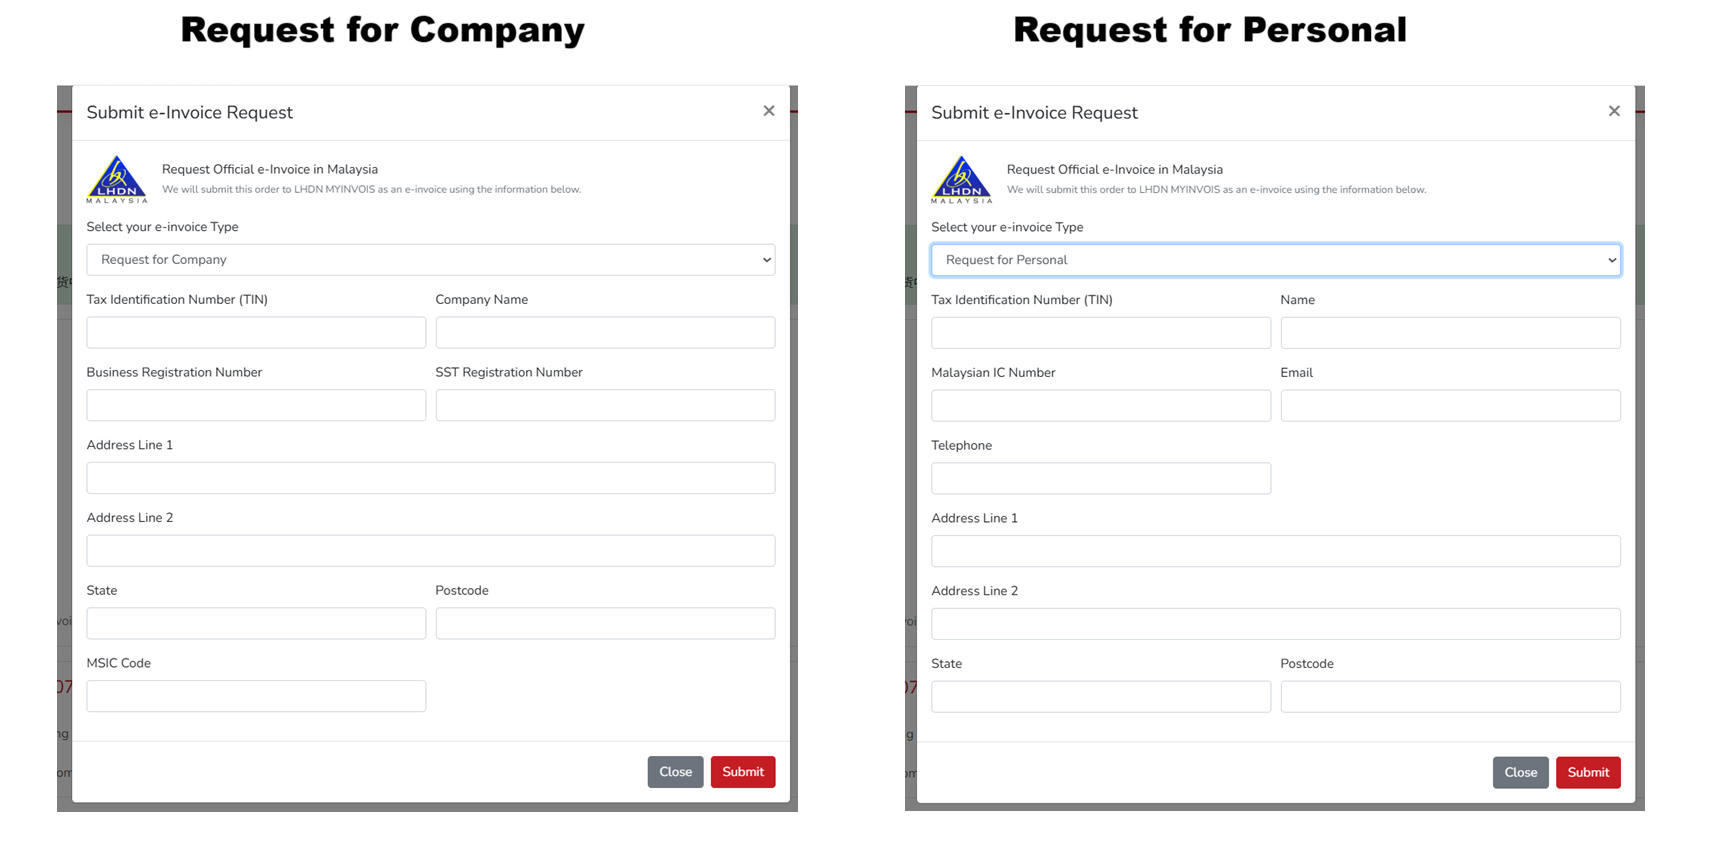
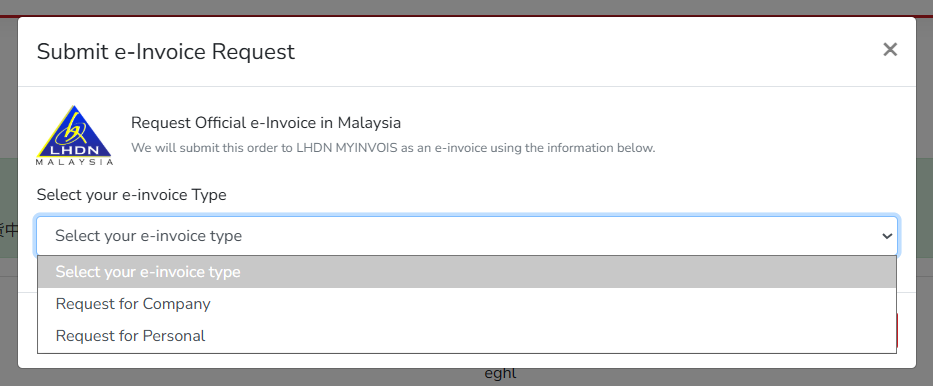
Step 3: Select e-invoice Type
Step 4: Fill in the required information. Once done, click "Submit"
It will then display the e-invoice status.
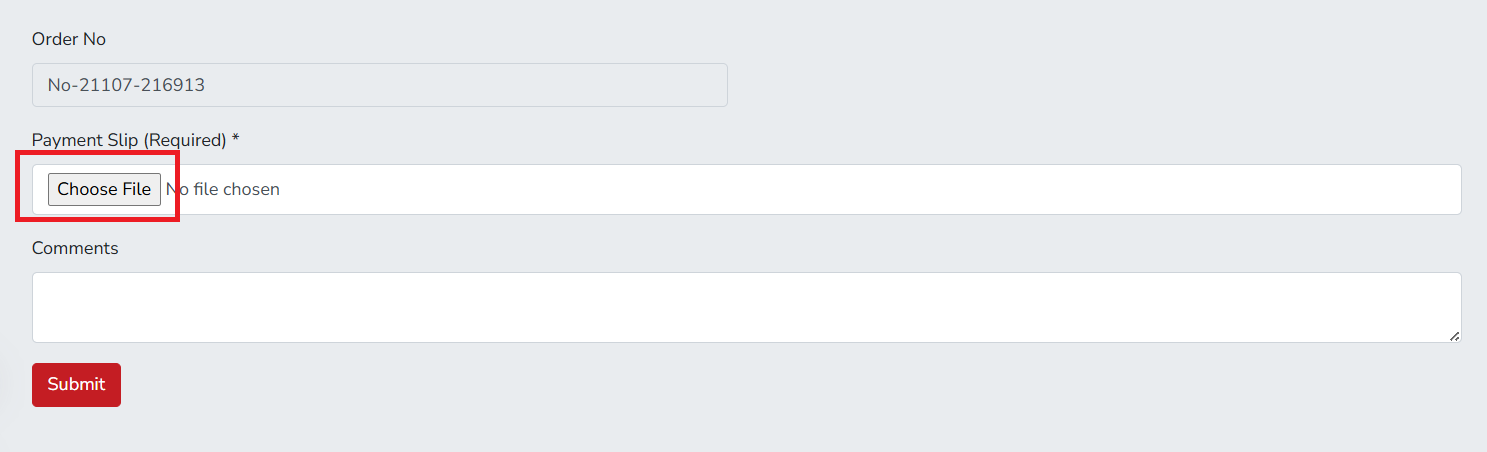
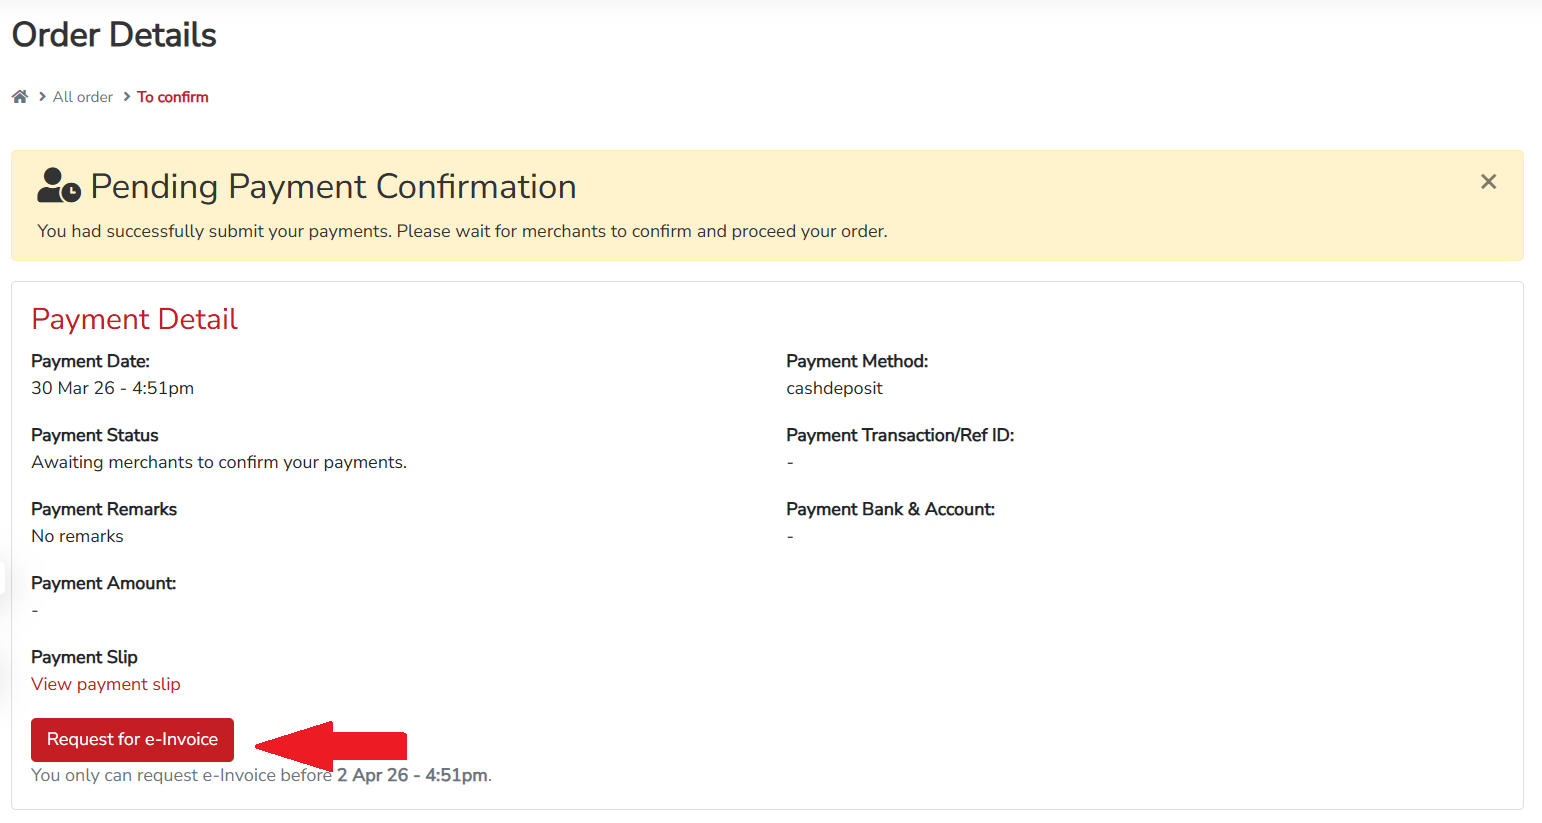
Situation 2: Buyer makes payment via manual payment and submits the payment slip.
Step 1: Buyer need to click "Choose File" to upload payment slip
Step 2: Once the buyer has completed payment and submitted the payment slip, they can click 'Request for e-invoice'.
Step 3: Select e-invoice Type
Step 4: Fill in the required information. Once done, click "Submit"
It will then display the e-invoice status.
Section 3: How E-Invoice Request Work
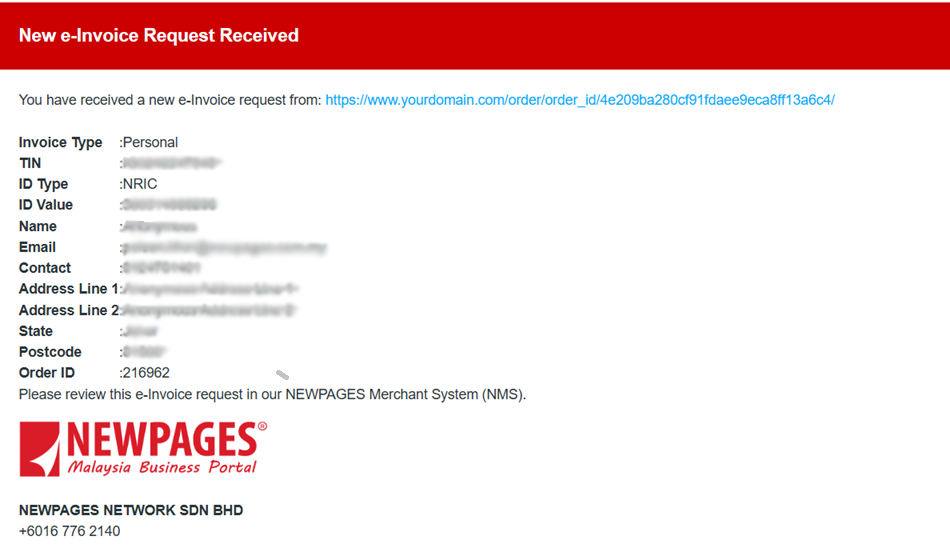
Once the buyer submits their e-invoice request, the merchant will receive an email notification (see sample email above), and the information will automatically appear in the NMS e-invoice request listing.
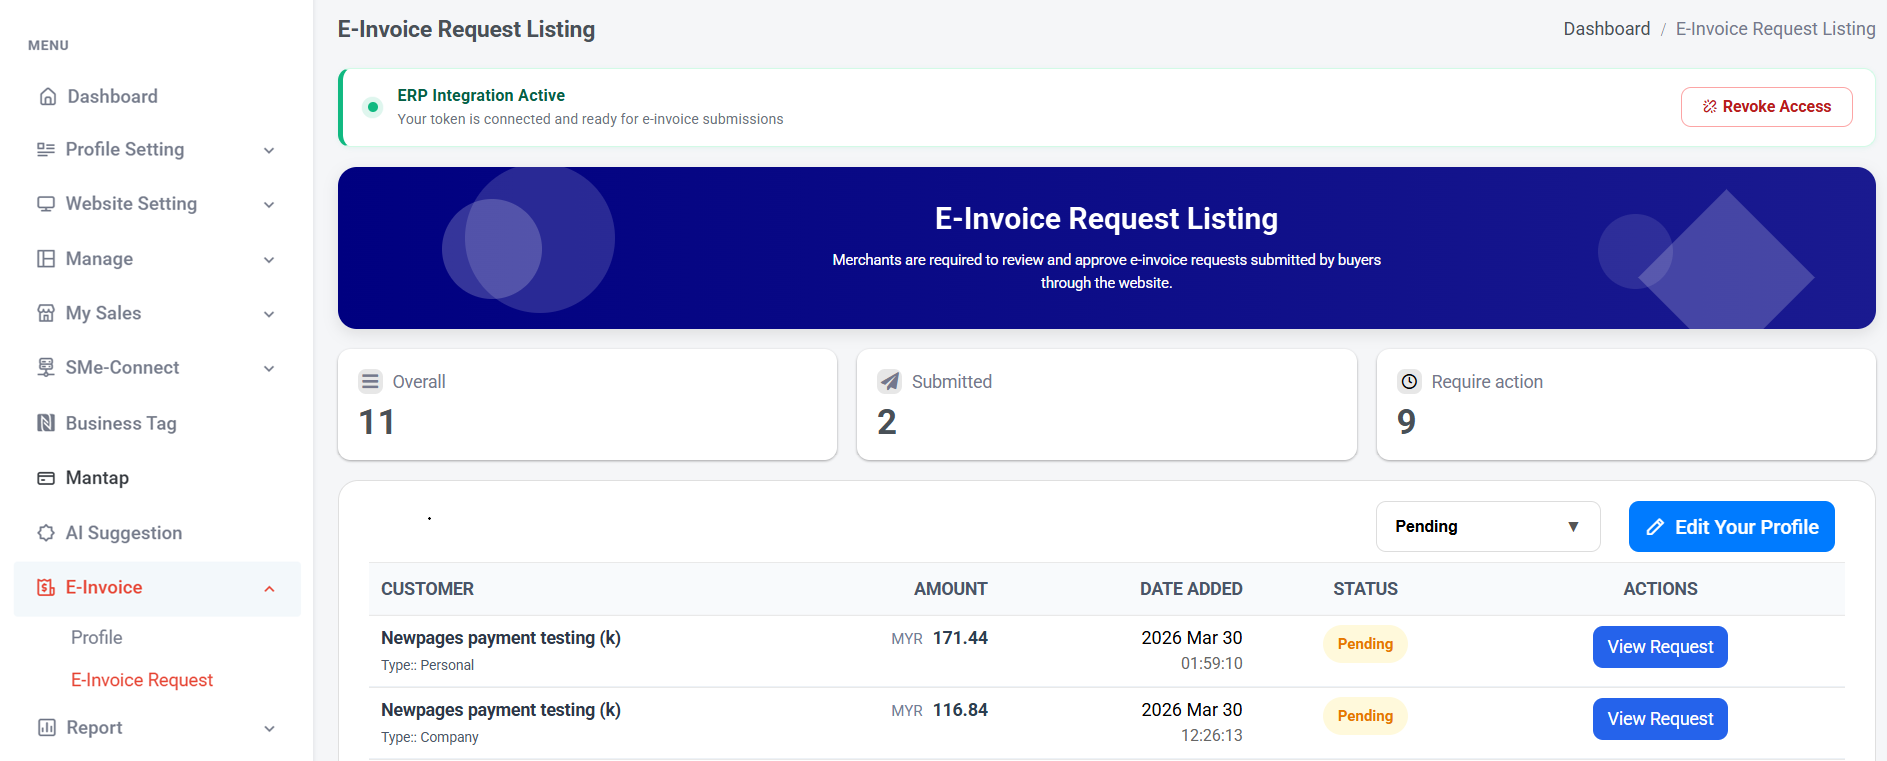
Step 1: Go to NMS System → E-Invoice (Left side panel) → E-Invoice Request to view all e-invoice requests along with their information and status.
Step 2: Click "View Request"
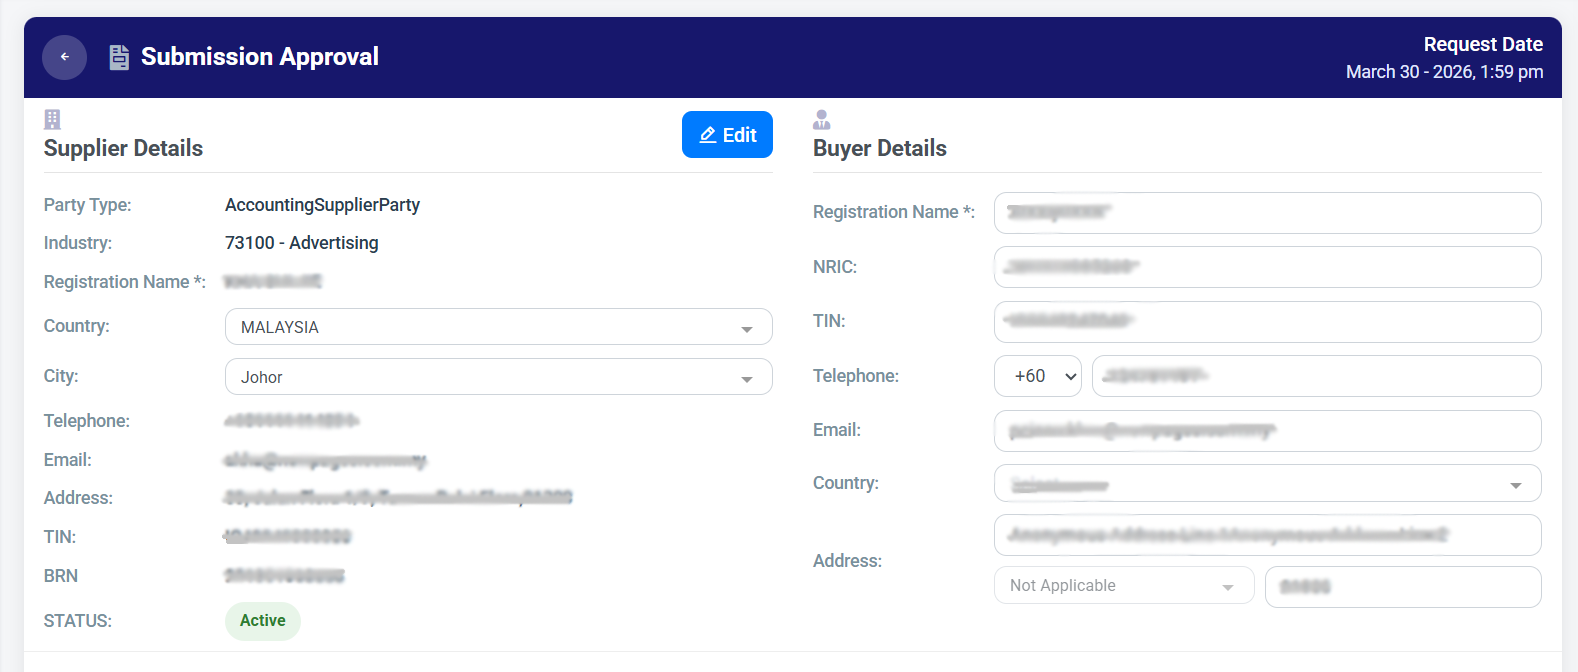
Step 3: Check the information. If you wish to edit supplier details, you can click 'Edit' to make changes. If everything is okay, scroll down.
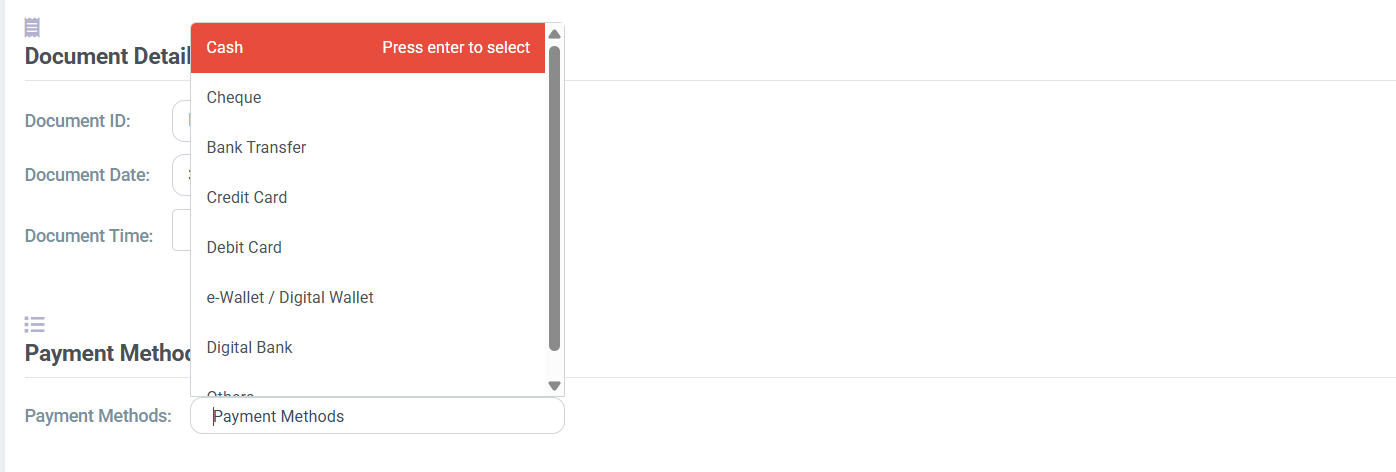
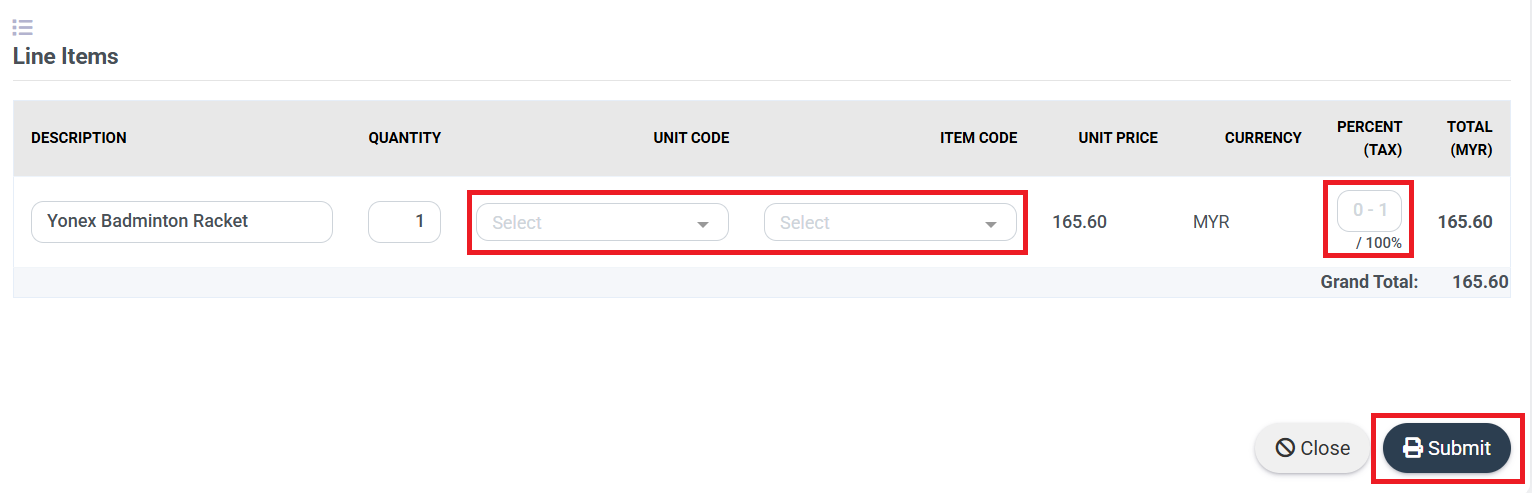
Step 4: Check document details, update payment methods
Step 5: Select the unit code and item code. If there is a tax charge, you can fill in the tax percentage. Once done, click 'Submit'.
The e-Invoice will be automatically displayed in the MyInvois Portal.
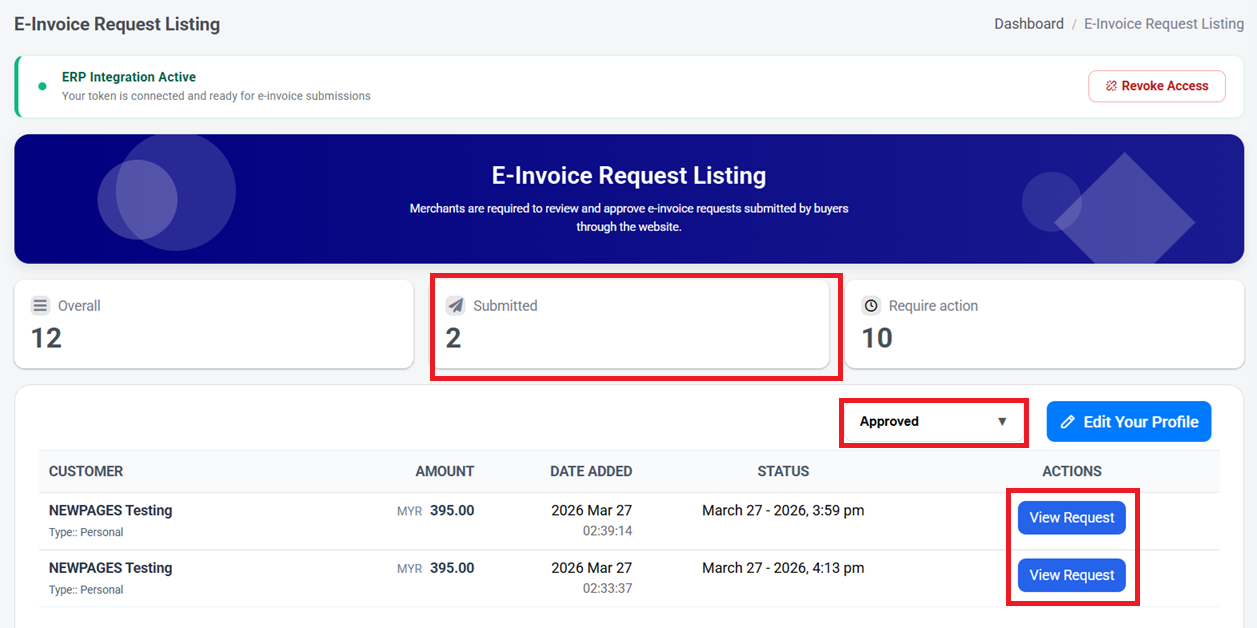
You can also check all request statuses in the E-Invoice Request Listing. You can click 'Submitted' or filter by 'Approved'.
You can click 'View Request' to check the information and validation status.
You can also click 'View Official Invoice' to view the invoice, or click 'Close' to close it.
Tags:
Related Article: